(Re)creating the central piece of the Skušek's lived-in experience
Text by Max Frühwirt
After analysing most of the existing data on the Skušek’s lived-in collection, it has become apparent, that within their staged “show room”, the dresser takes on a pivotal role in their curative efforts. Because of this, we decided to also make the dresser and its surroundings a central piece of our digitisation efforts, as doing so would probably yield the closest approximation to what past visitors of the Skušek’s apartments may have experienced when visiting the couple. Because, while it may be true that the configuration of the Buddhist images atop the dresser changed with time and the different locations they inhabited, the furniture’s central function remains the same. As a narrative device, the Chinese dresser has therefore already become multi-layered. What better way then, than to add an additional interpretation to the dresser’s function by also using it as a showcase for the creation of its digital twin within the virtual, a case study for how our multi-step digitisation workflow works so to speak. It is important to note, however, that the dresser is still a work-in-progress at the time of writing this blog-post and will thus also be understood and explained as such.
Step 1 – Survey and collection of image data
Starting with a detailed survey of the dresser, during which both its external dimensions and any potential important details or carvings were documented using close-up photographs, we prepared to take the necessary set of photographs for digital scanning. To scan the dresser and turn it into a 3D model for future implementation in our application, we used a structure-from-motion workflow better known as image-based photogrammetry.
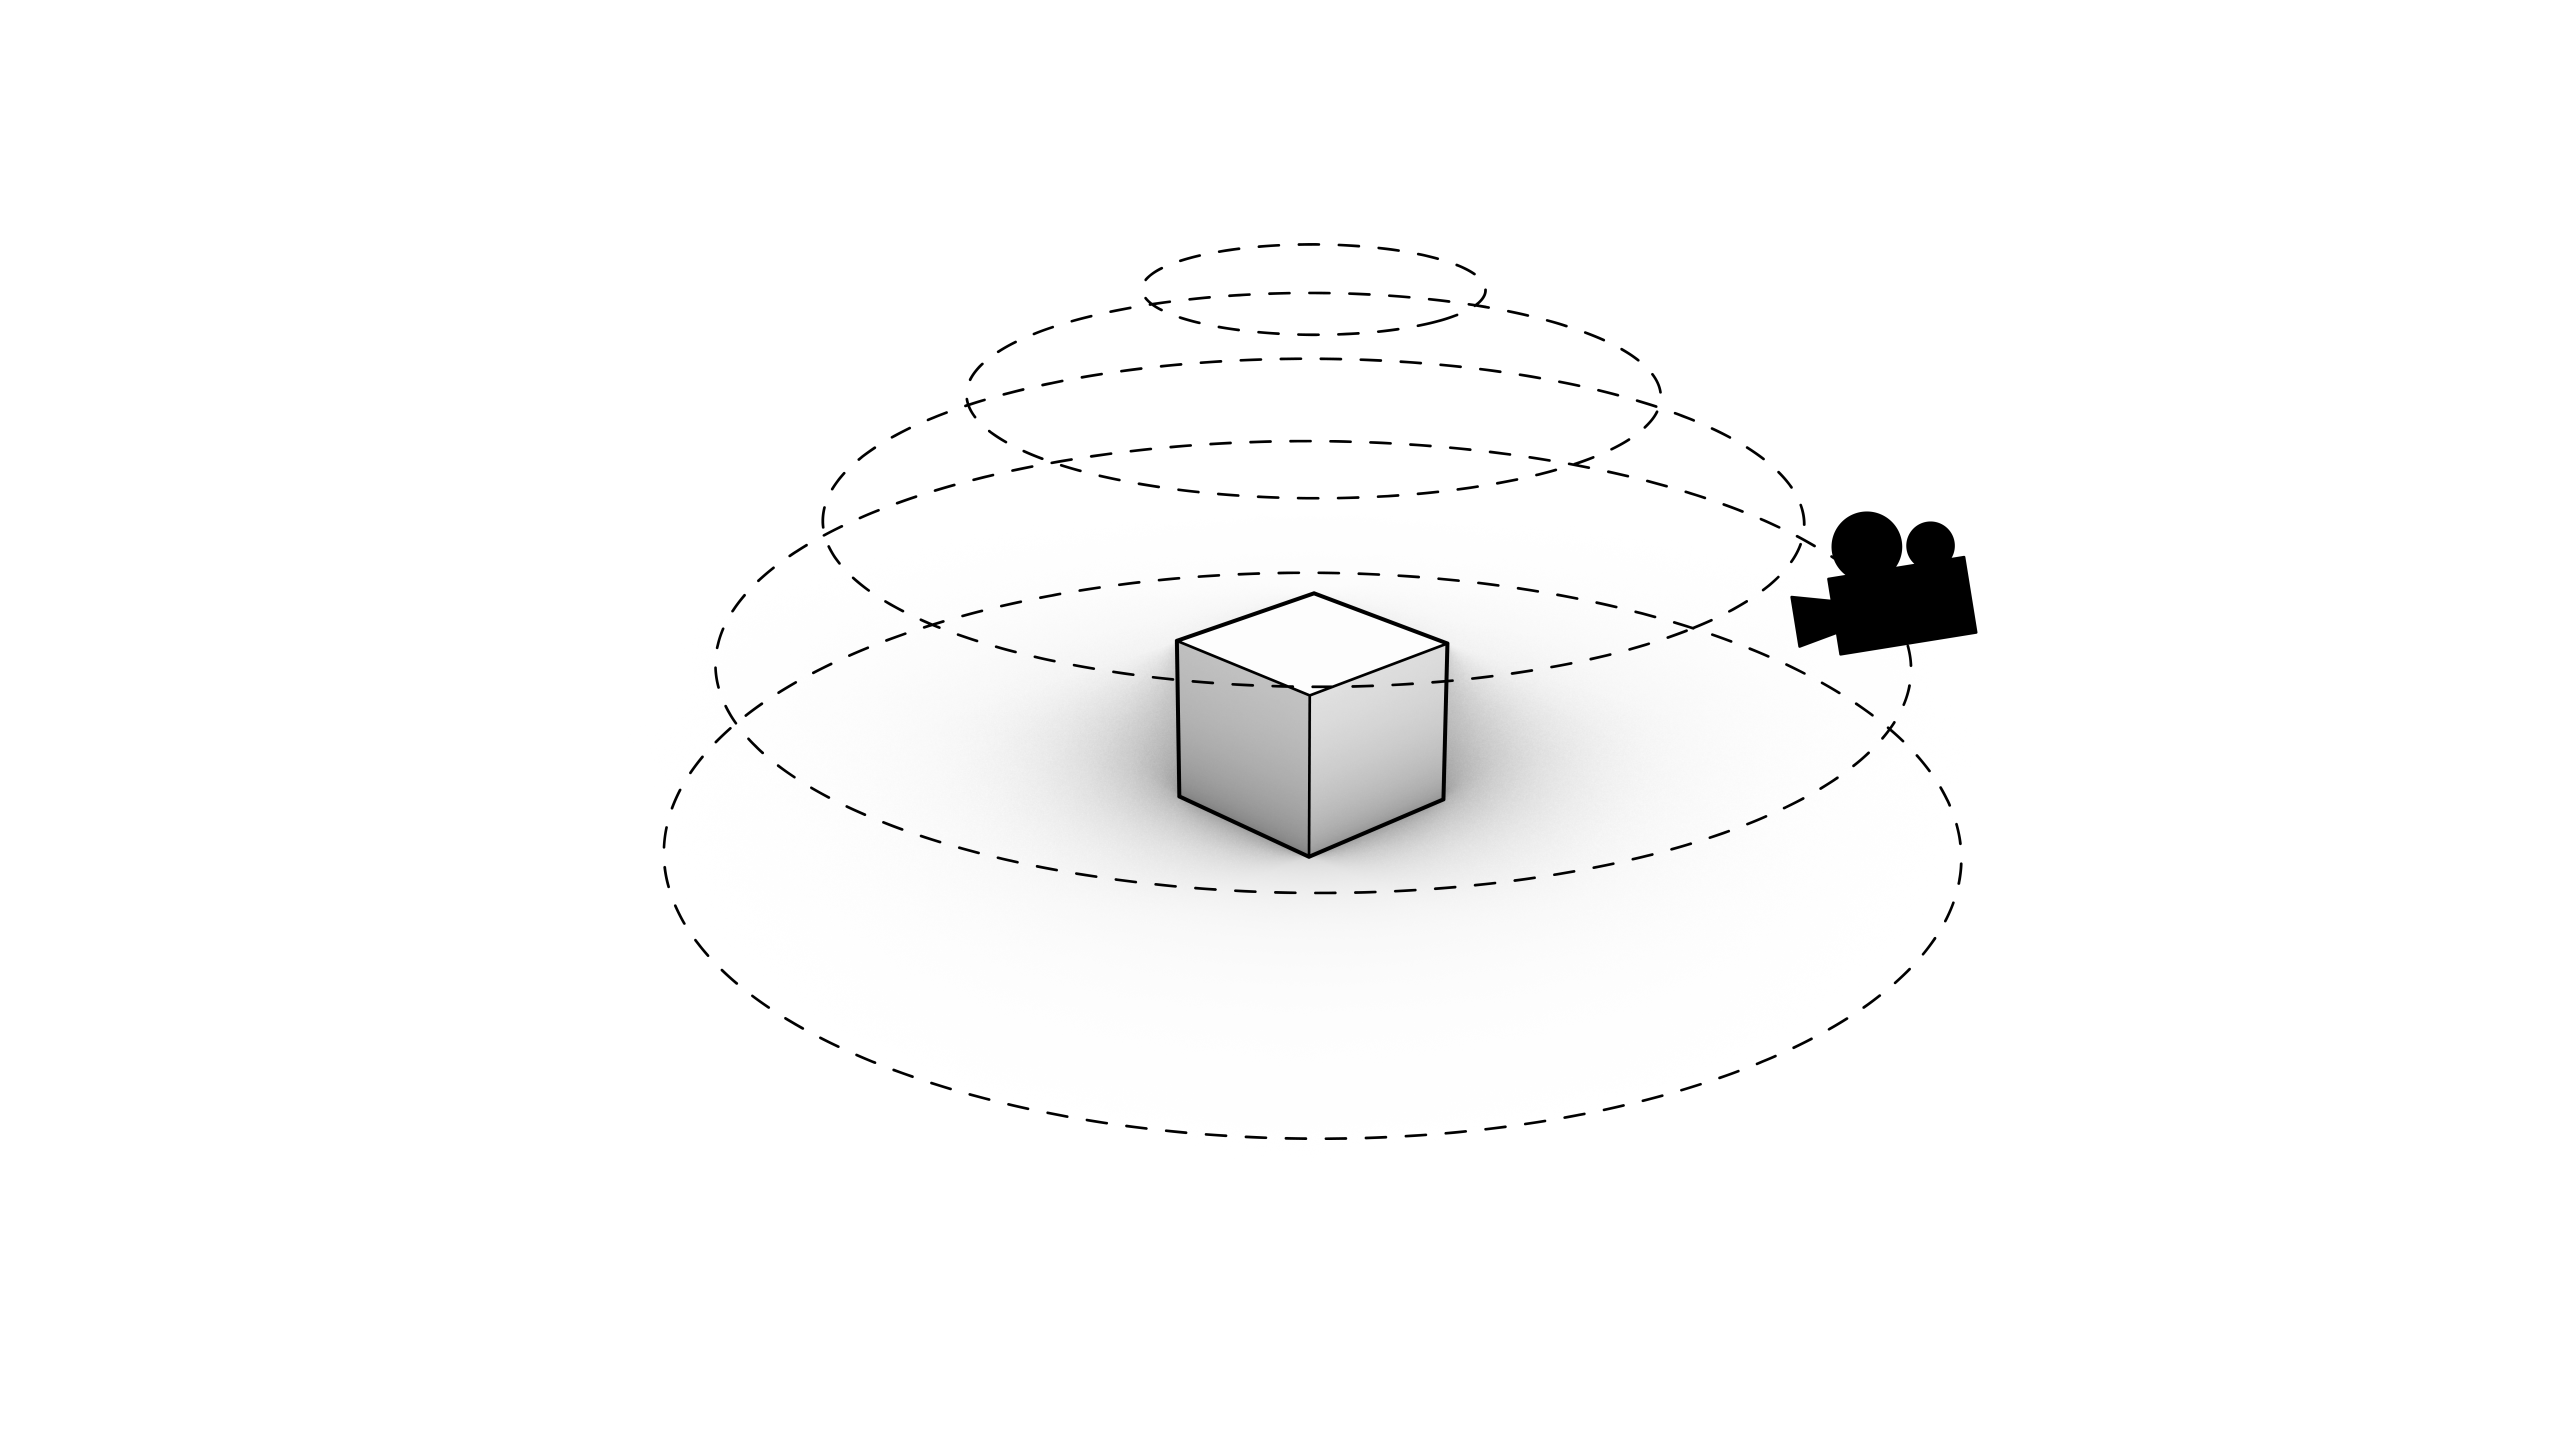
How to document and photograph an object for image-based photogrammetry, Illustration © Max Frühwirt 2022
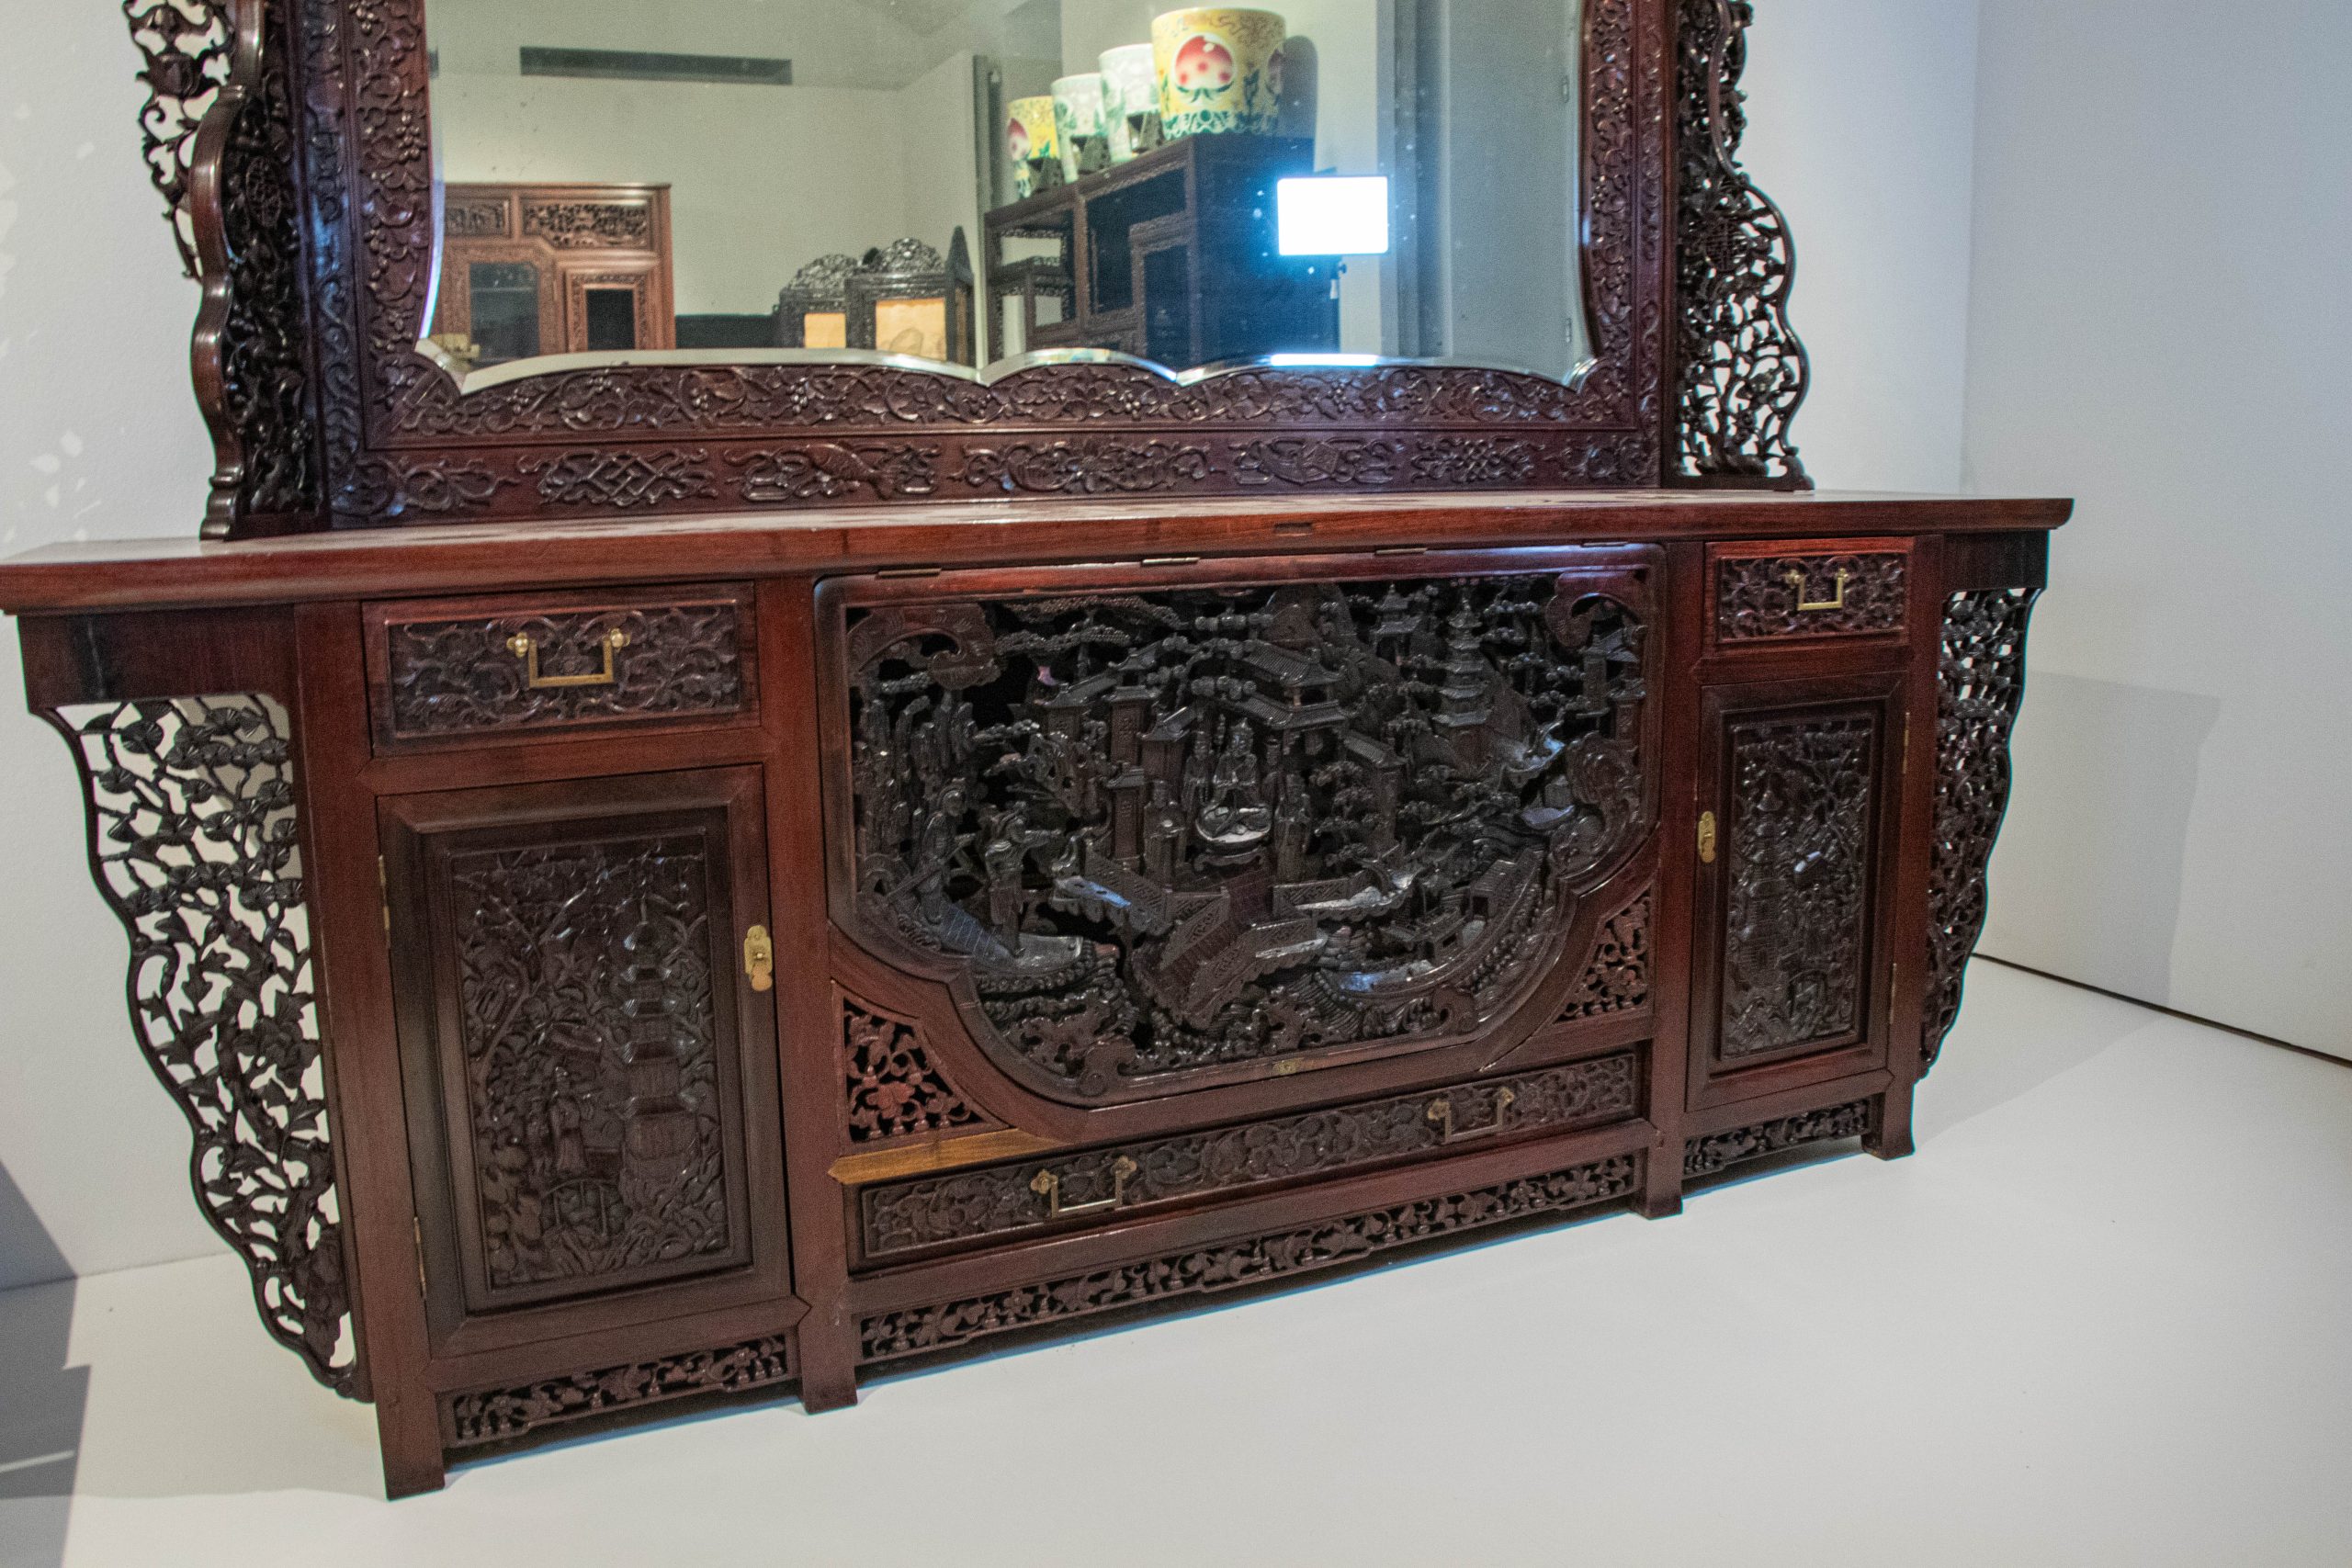
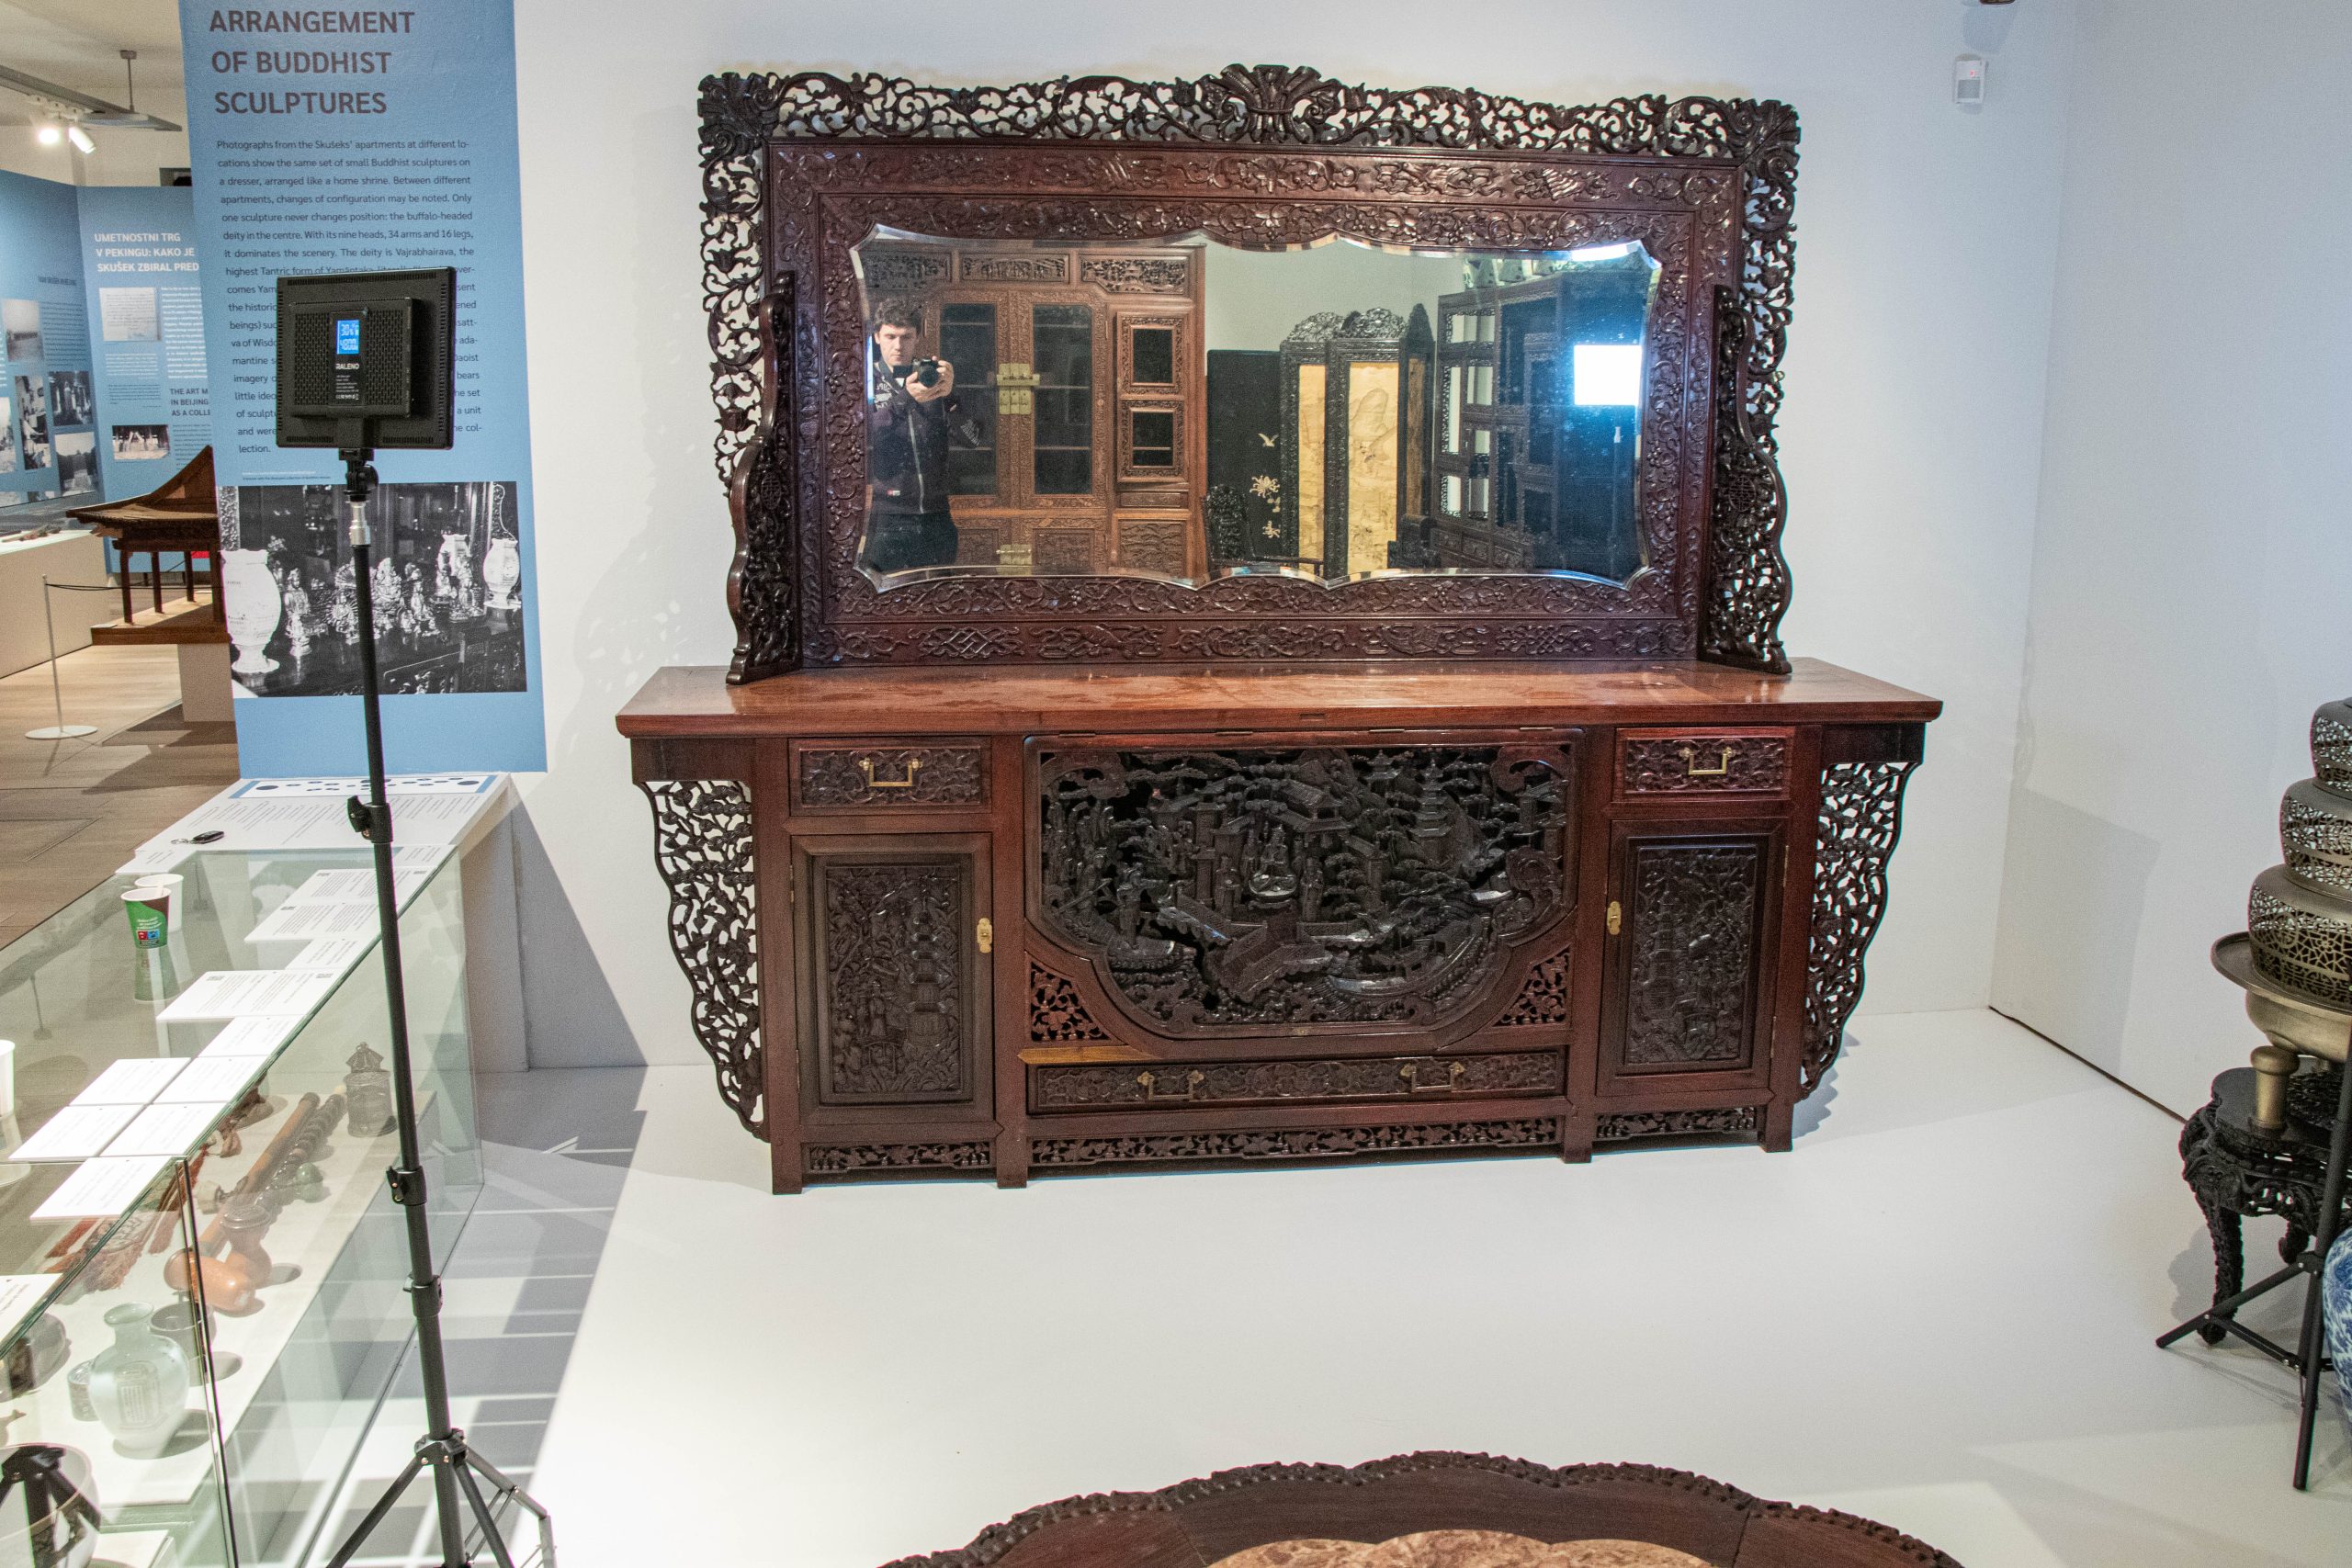
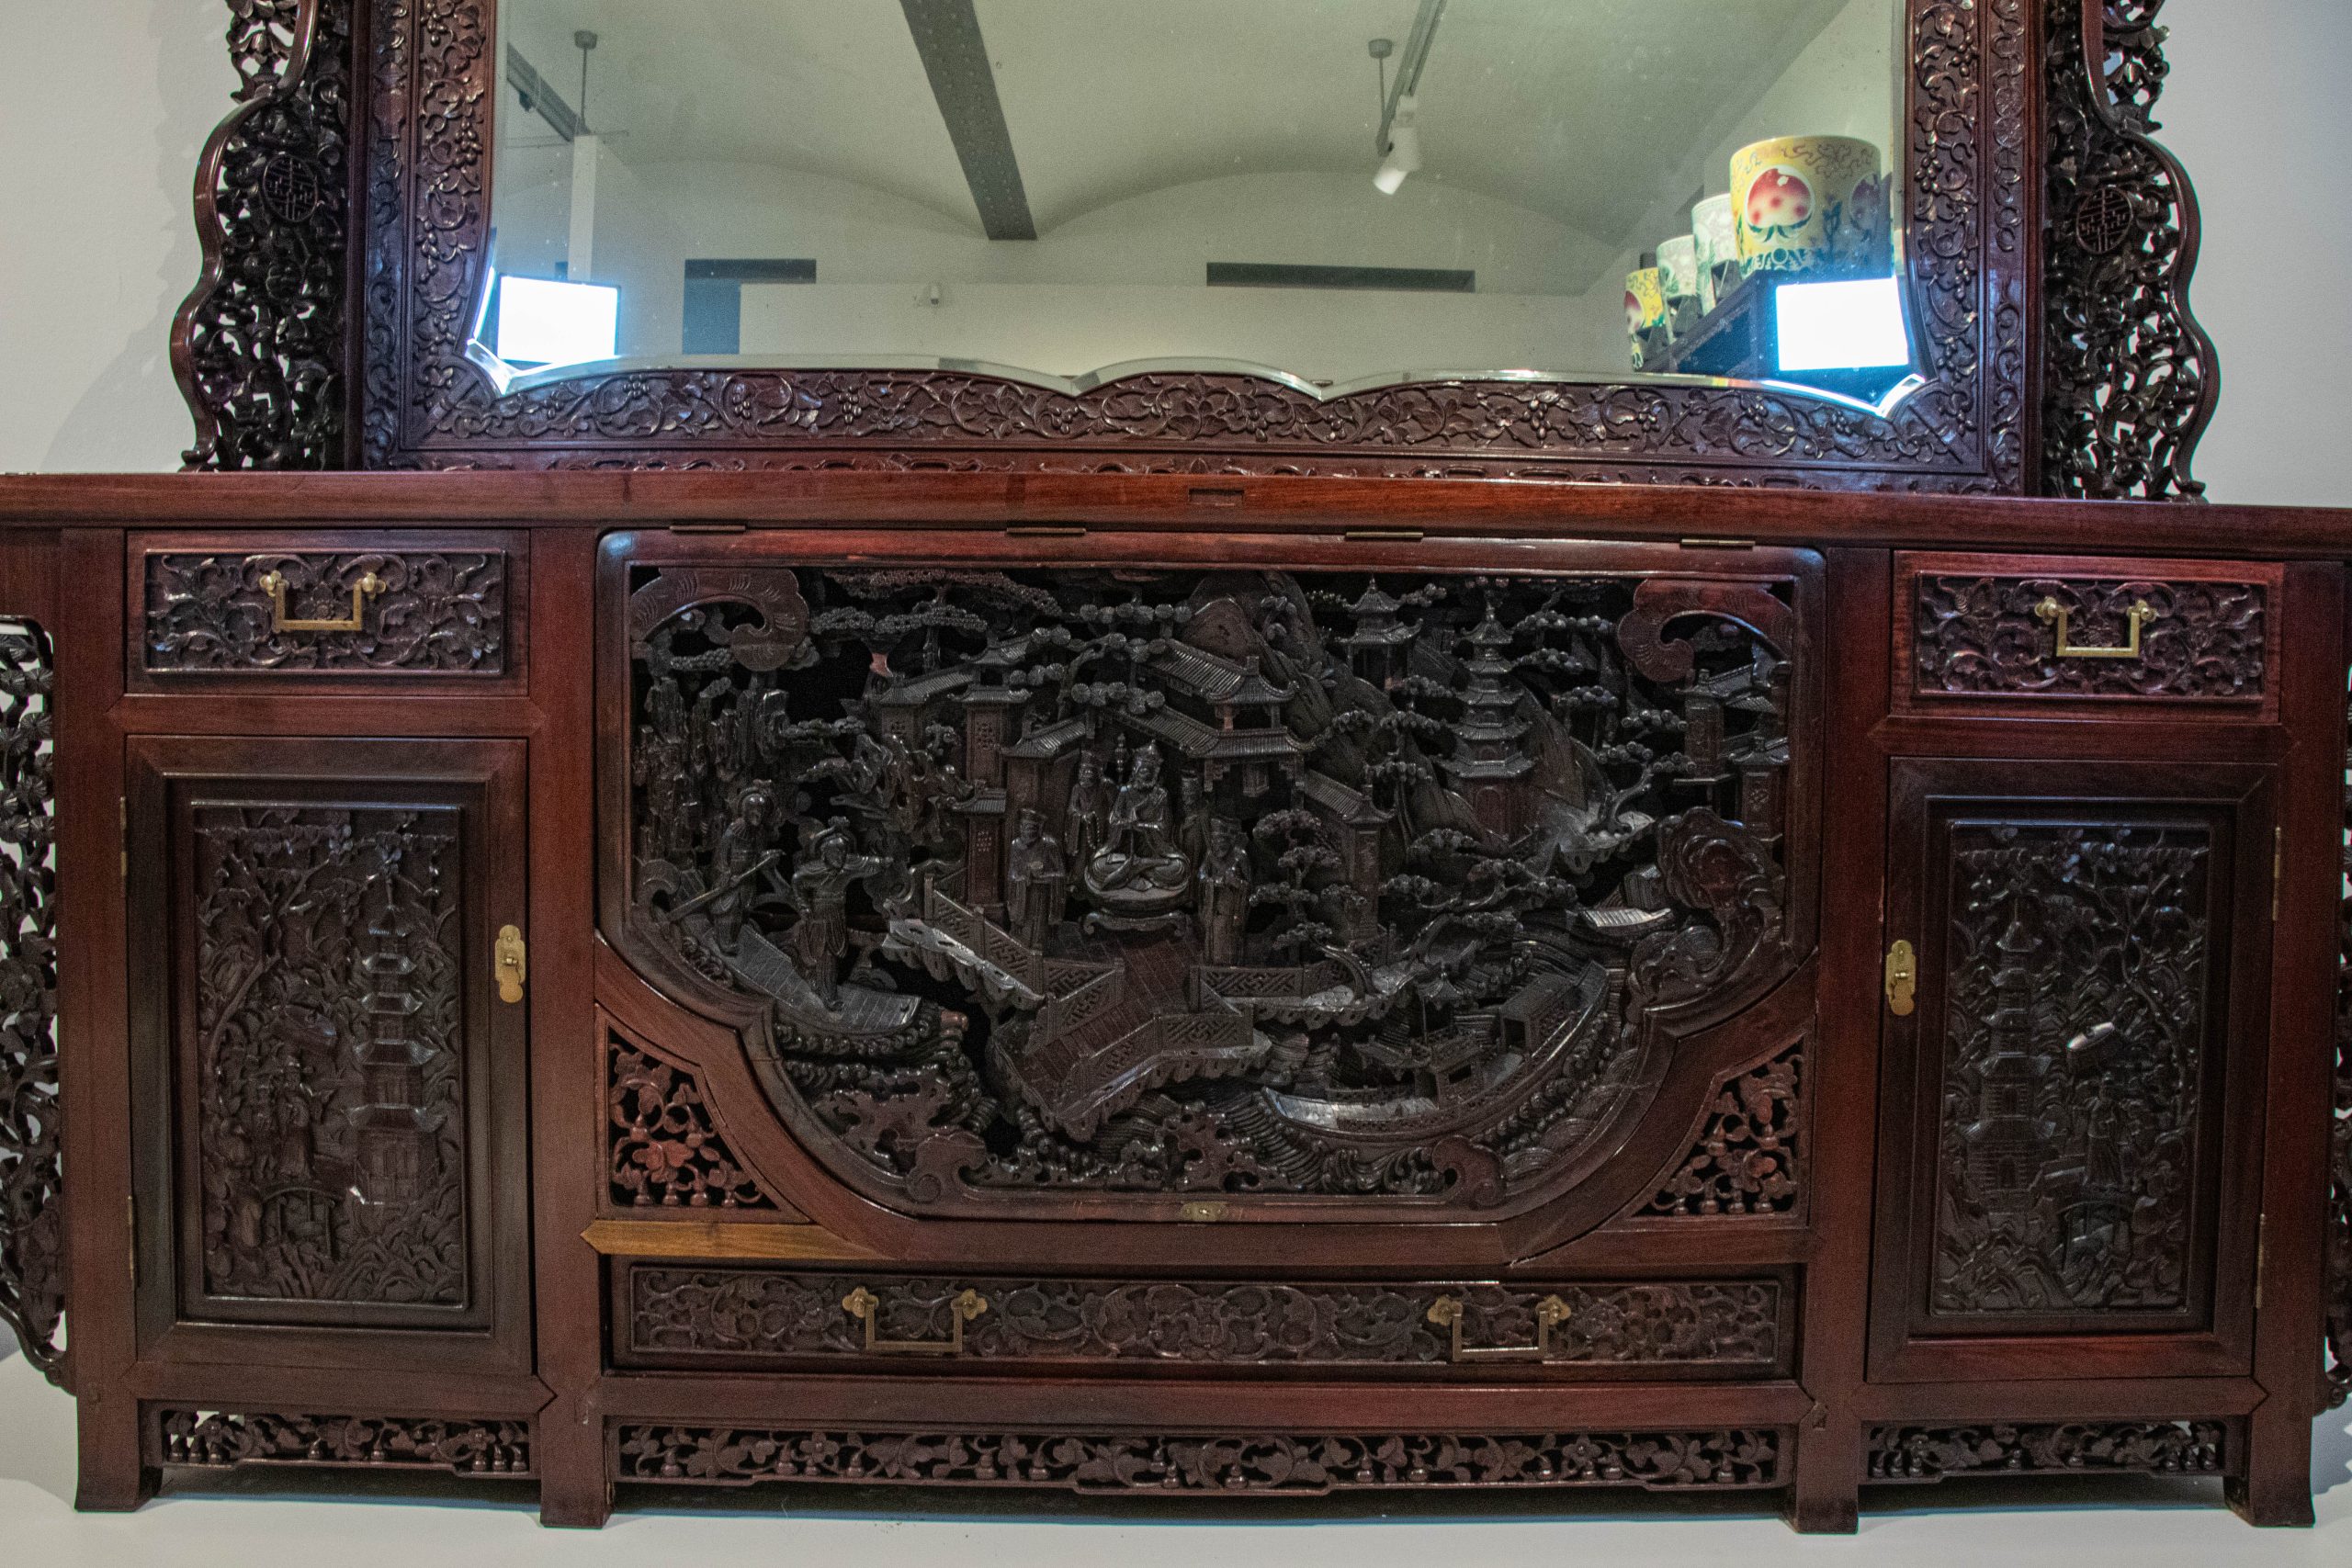
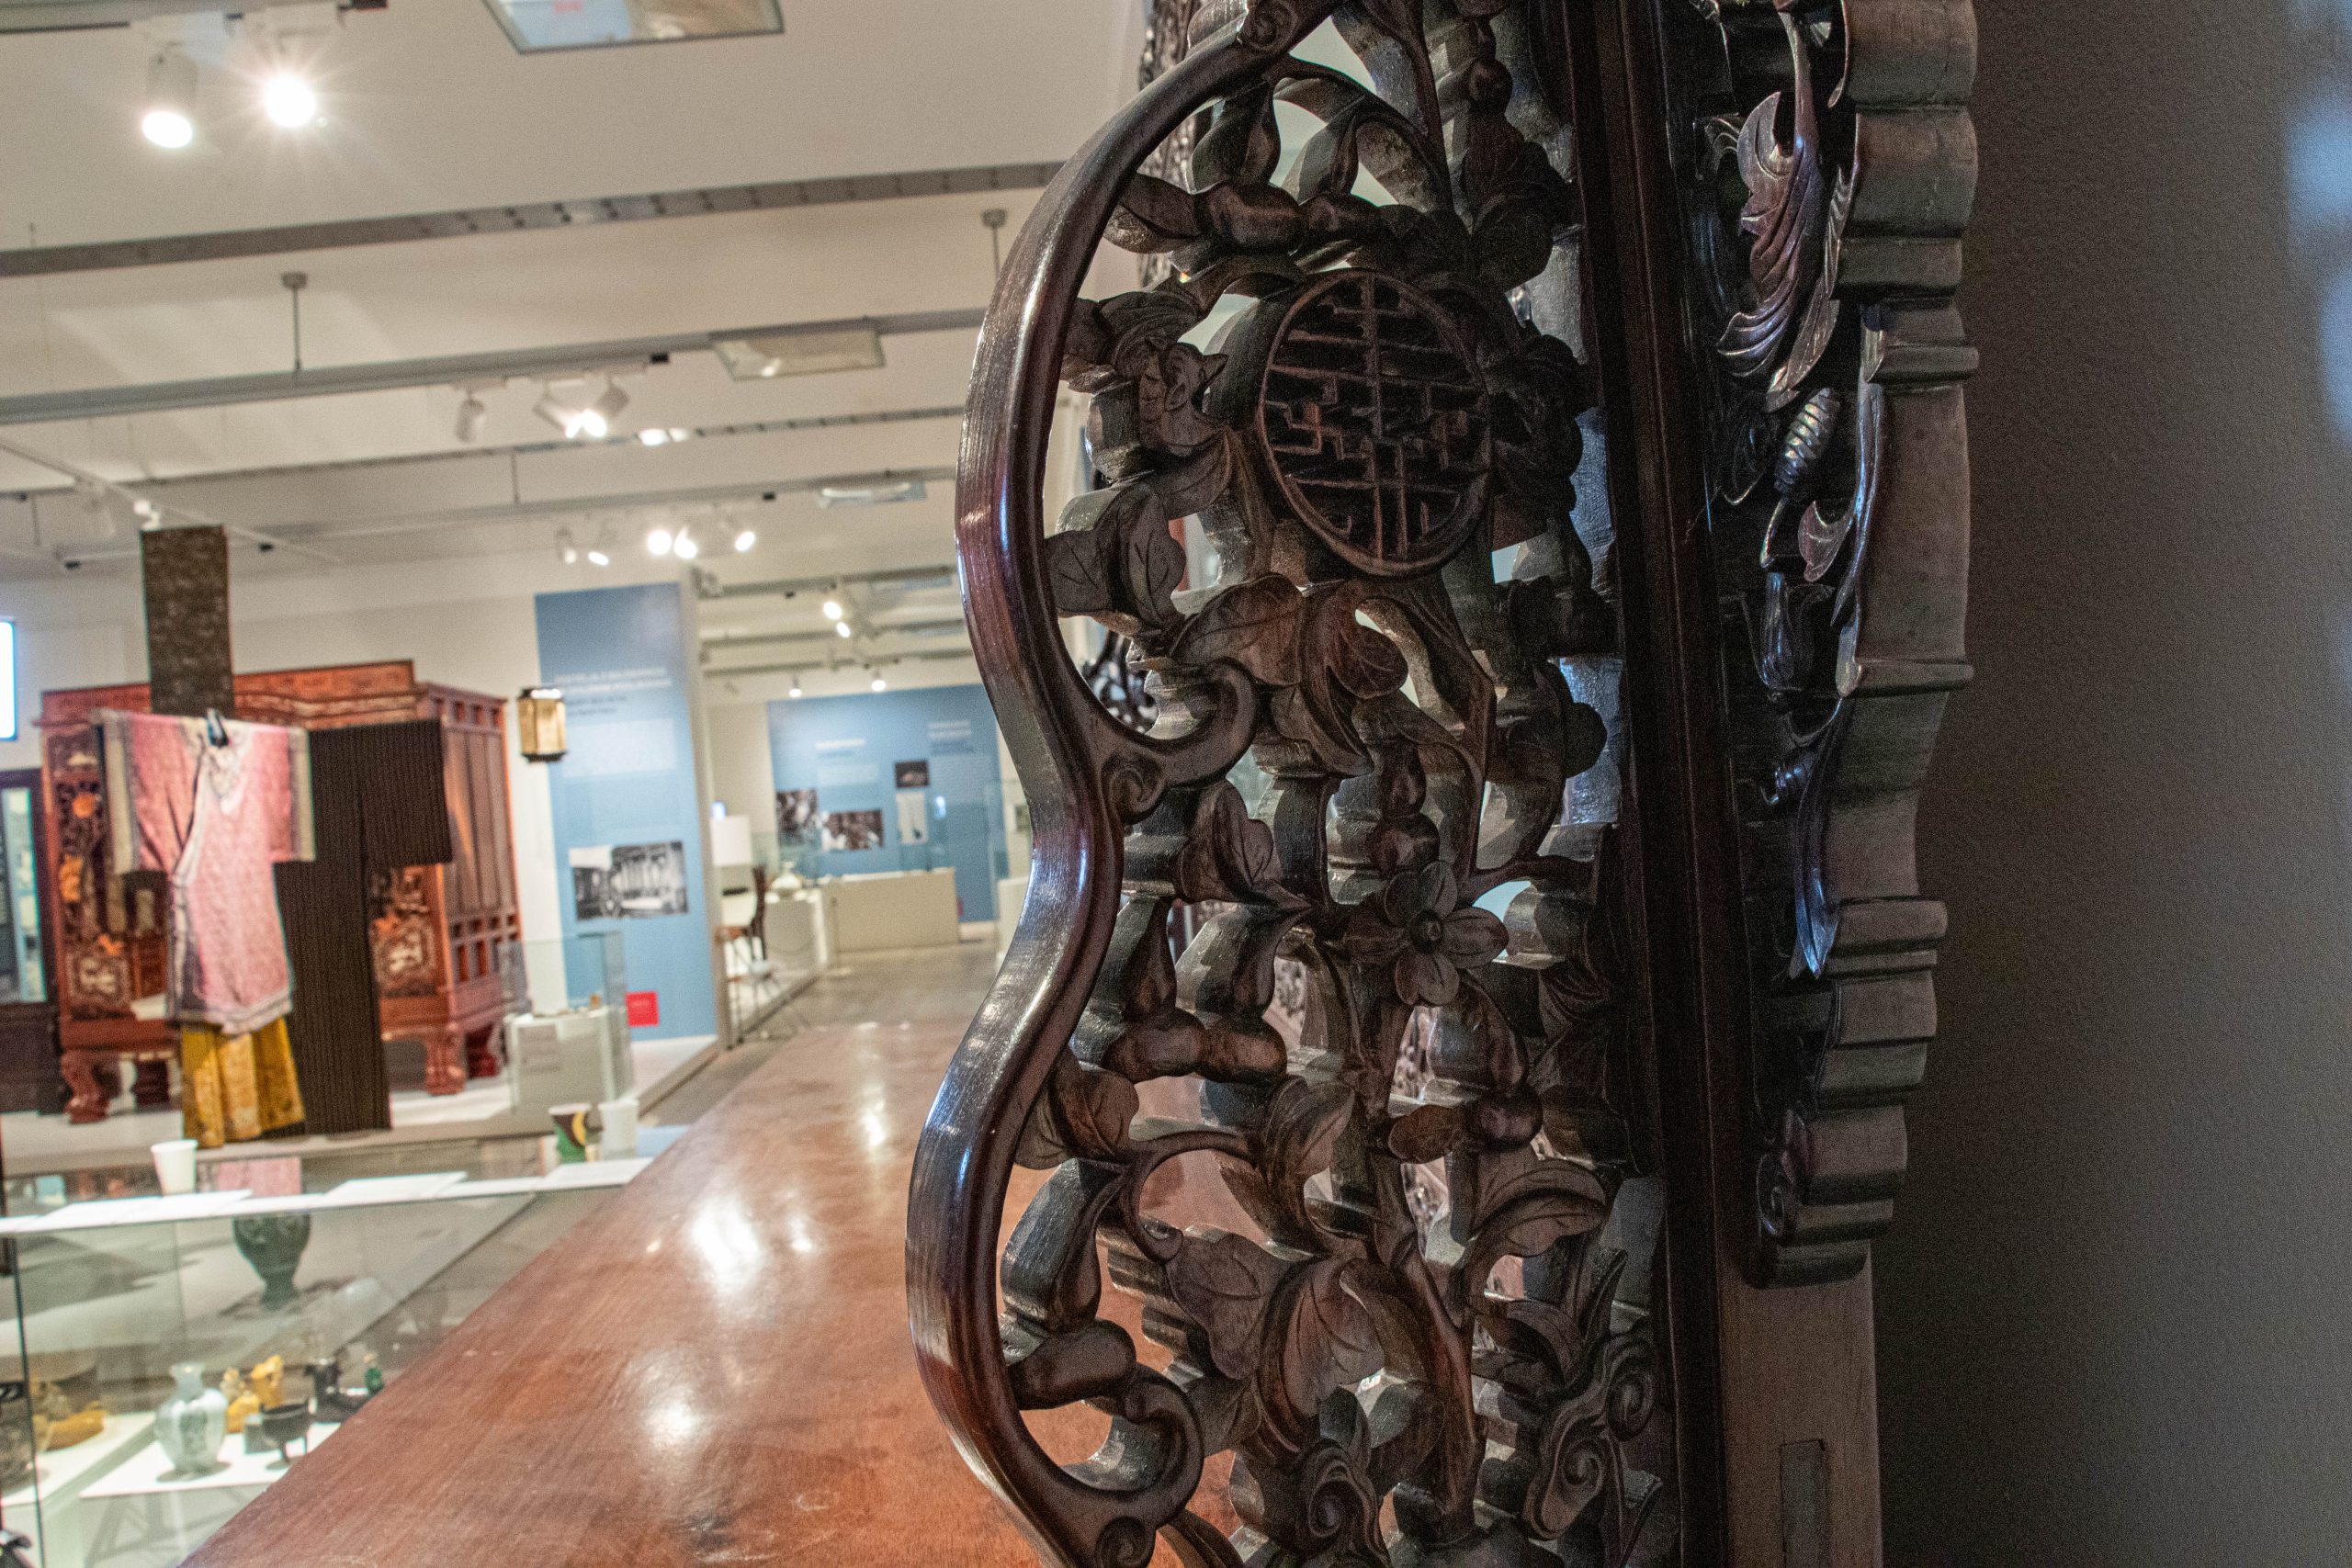
Dresser photographed from different angles including finer details, Photographs © Max Frühwirt 2024
To achieve the best possible results from our future scan, it is necessary to document and photograph the dresser from any possible angle, thereby making sure to not miss any of the intricate details and carvings. When taking photographs for such a process, it is usually best practice to include both shots of the complete dresser and close-ups of important or hard to spot details. To ensure a smooth scan, it is advised to aim for at least around 70% overlap between the different images. Since we were scanning quite a heavy and thus immovable object, it was difficult to access the backside of the dresser. In such a case, it is usually advisable to nonetheless move around the object in concentric circles, while adjusting both height and angle of the camera accordingly to ensure a complete documentation. When taking photographs for future digitisation, it can be beneficial to shoot in both JPG and RAW format, as doing so usually makes further processing and colour correction, which will be the next step, easier. In our case with the dresser, an image-set of 176 images, which were then processed for further digitisation, was created.
Step 2 – Refinement of dataset and preparation for scanning
Before importing our image-set into our photogrammetry software, it is first necessary to refine and adjust them in a very specific way. Doing so can help with both a smooth scanning process and also help later down the line when it comes visualisation of the created model. This step can also act as a pre-selection process and filter out any undesired or blurry images.
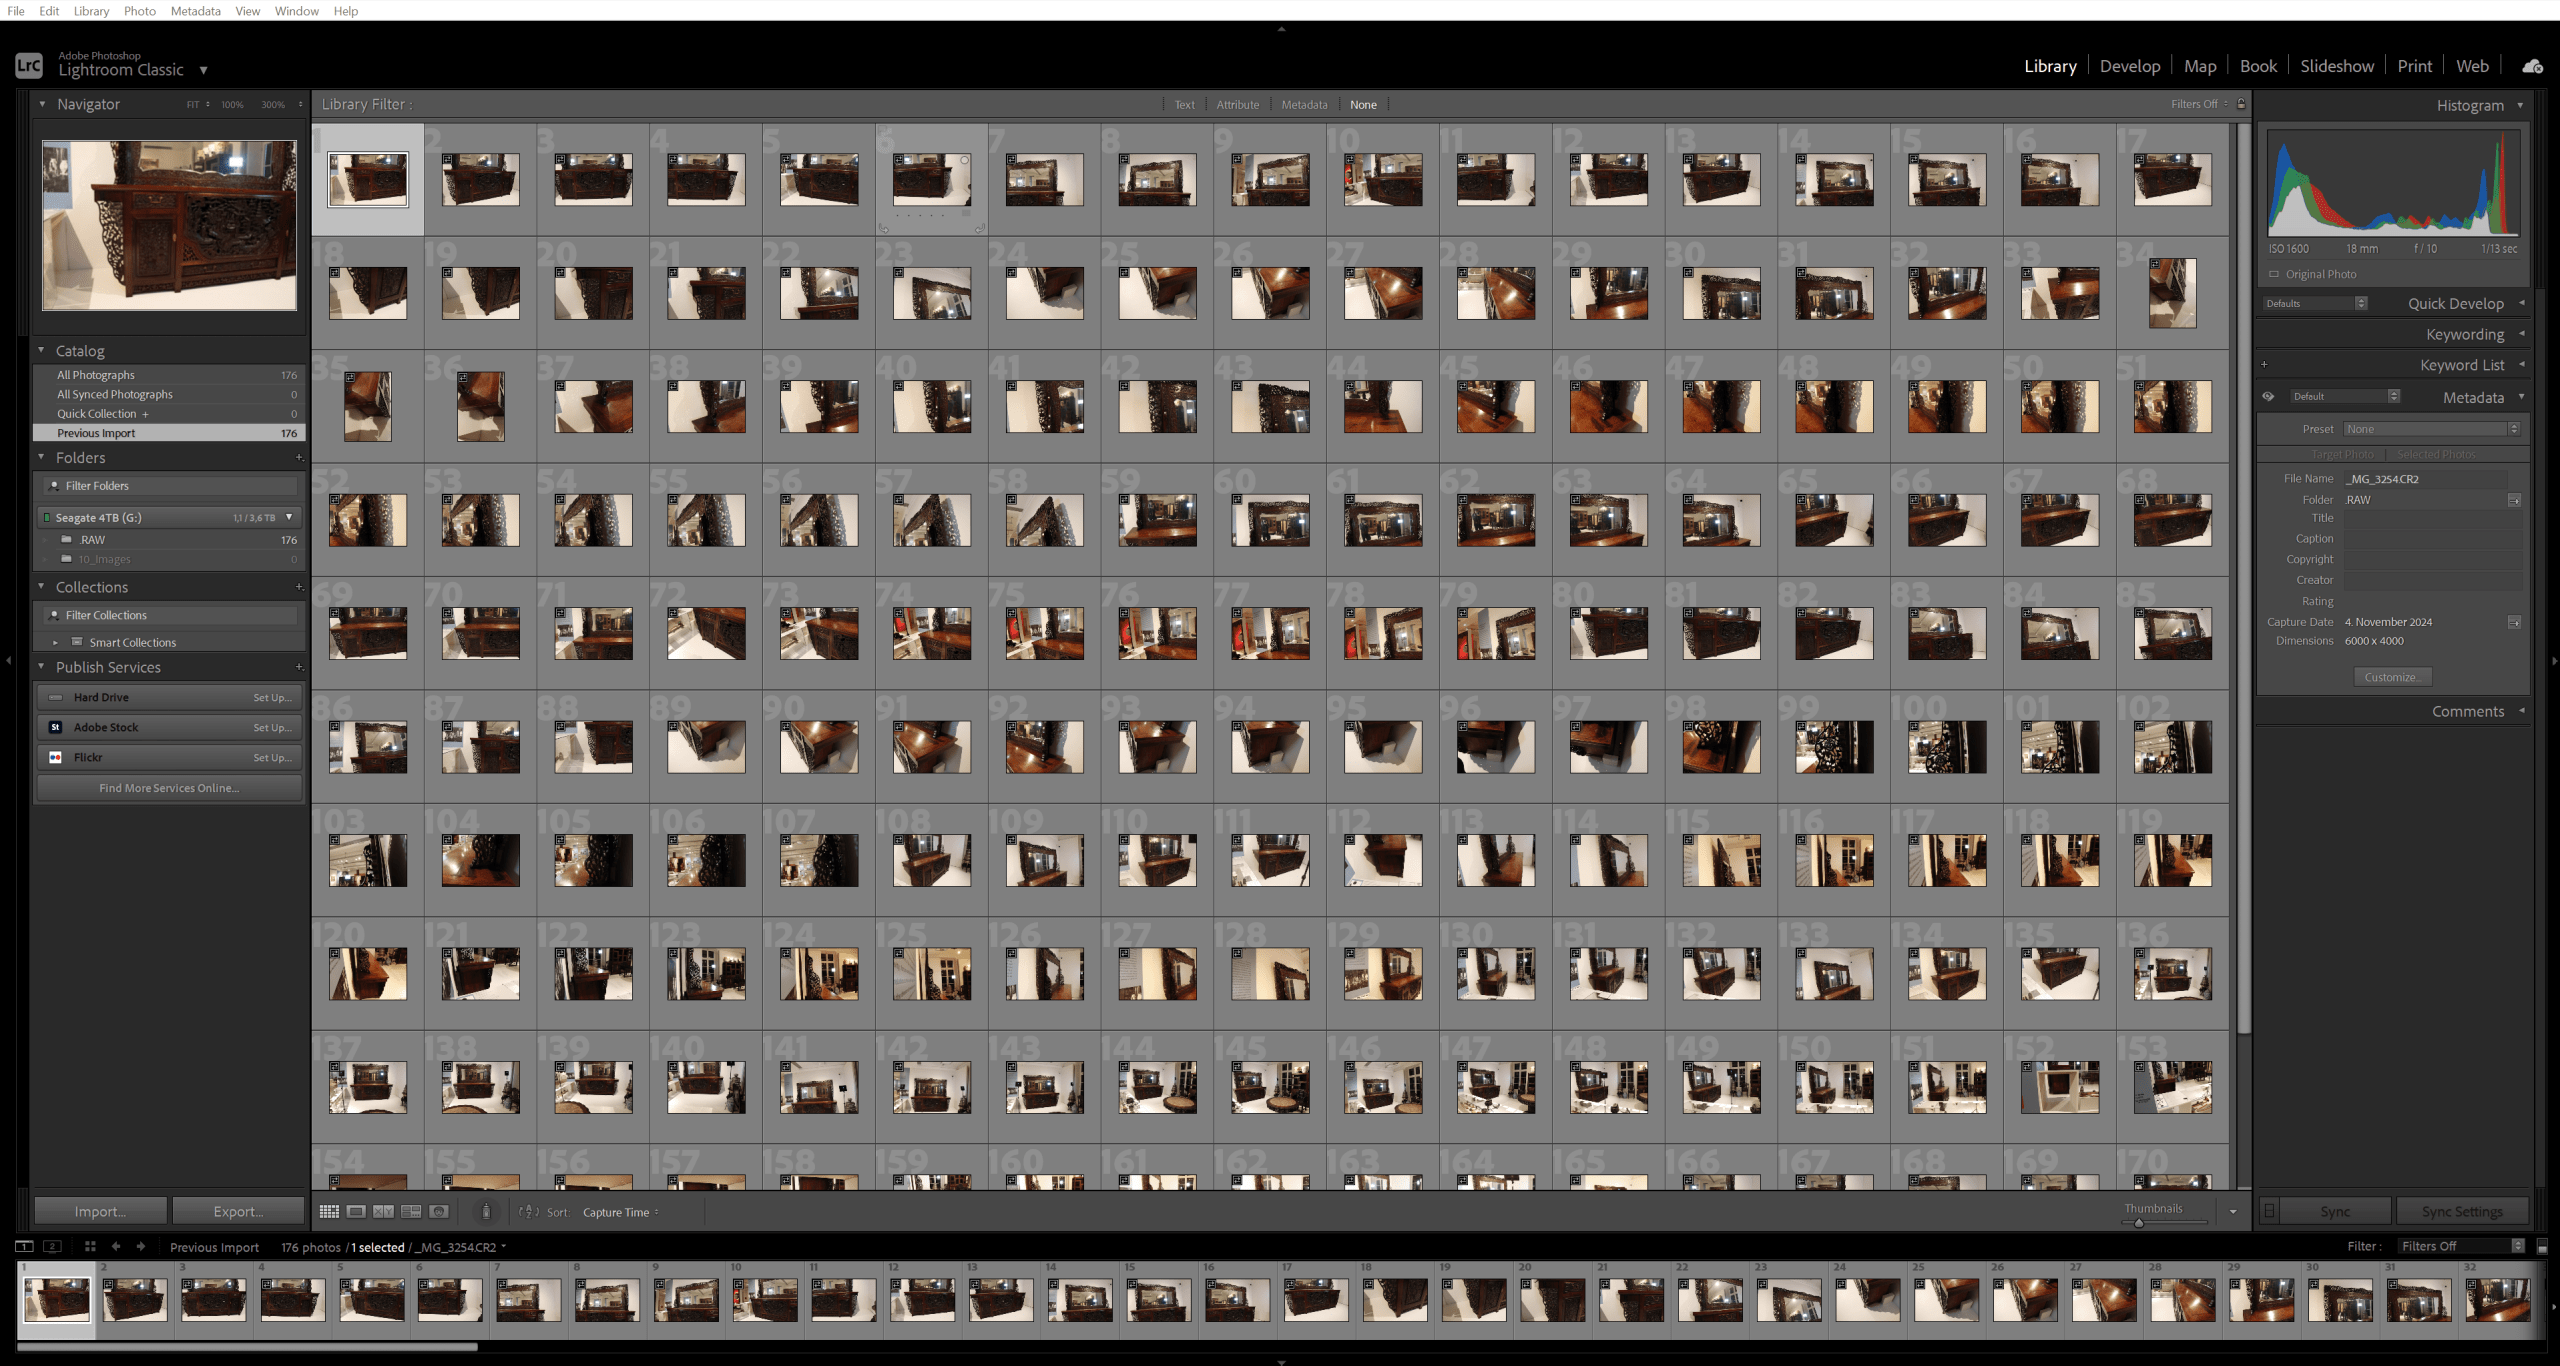
Imageset of the dresser prepared for pre-processing and colour-correction, Screenshot © Max Frühwirt 2024
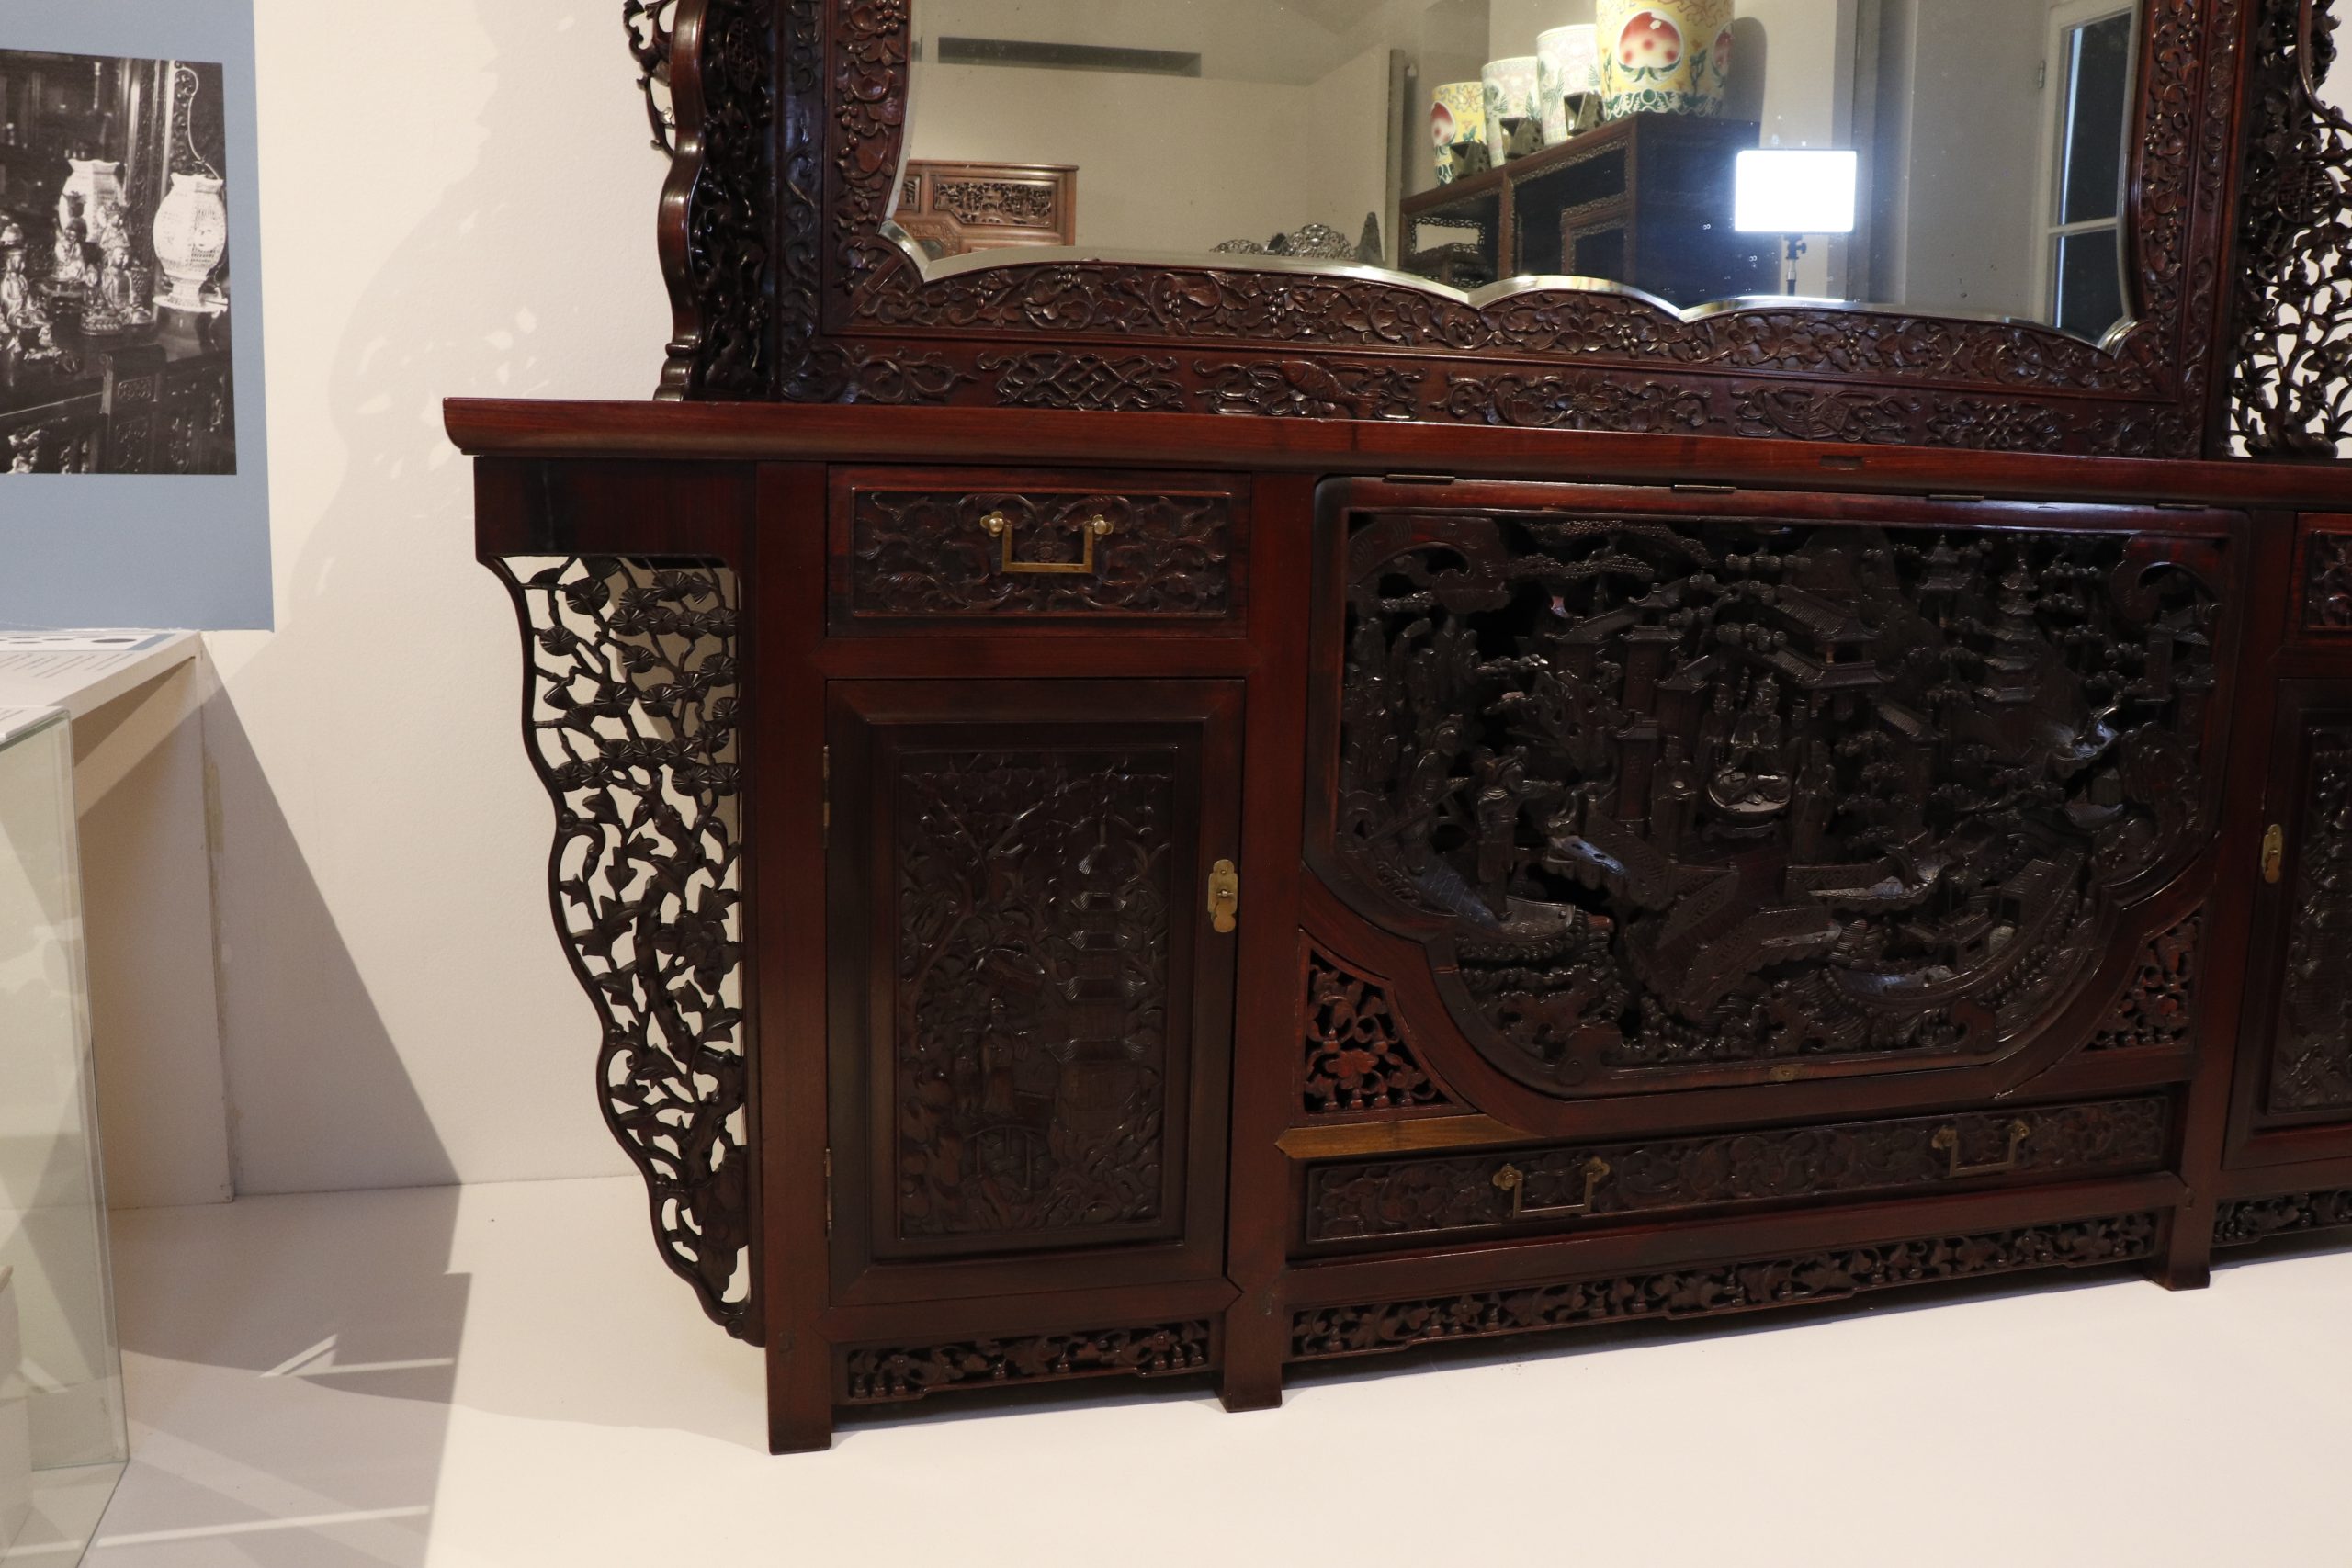
Select photograph of the dresser before colour-correction, Photograph © Max Frühwirt 2024
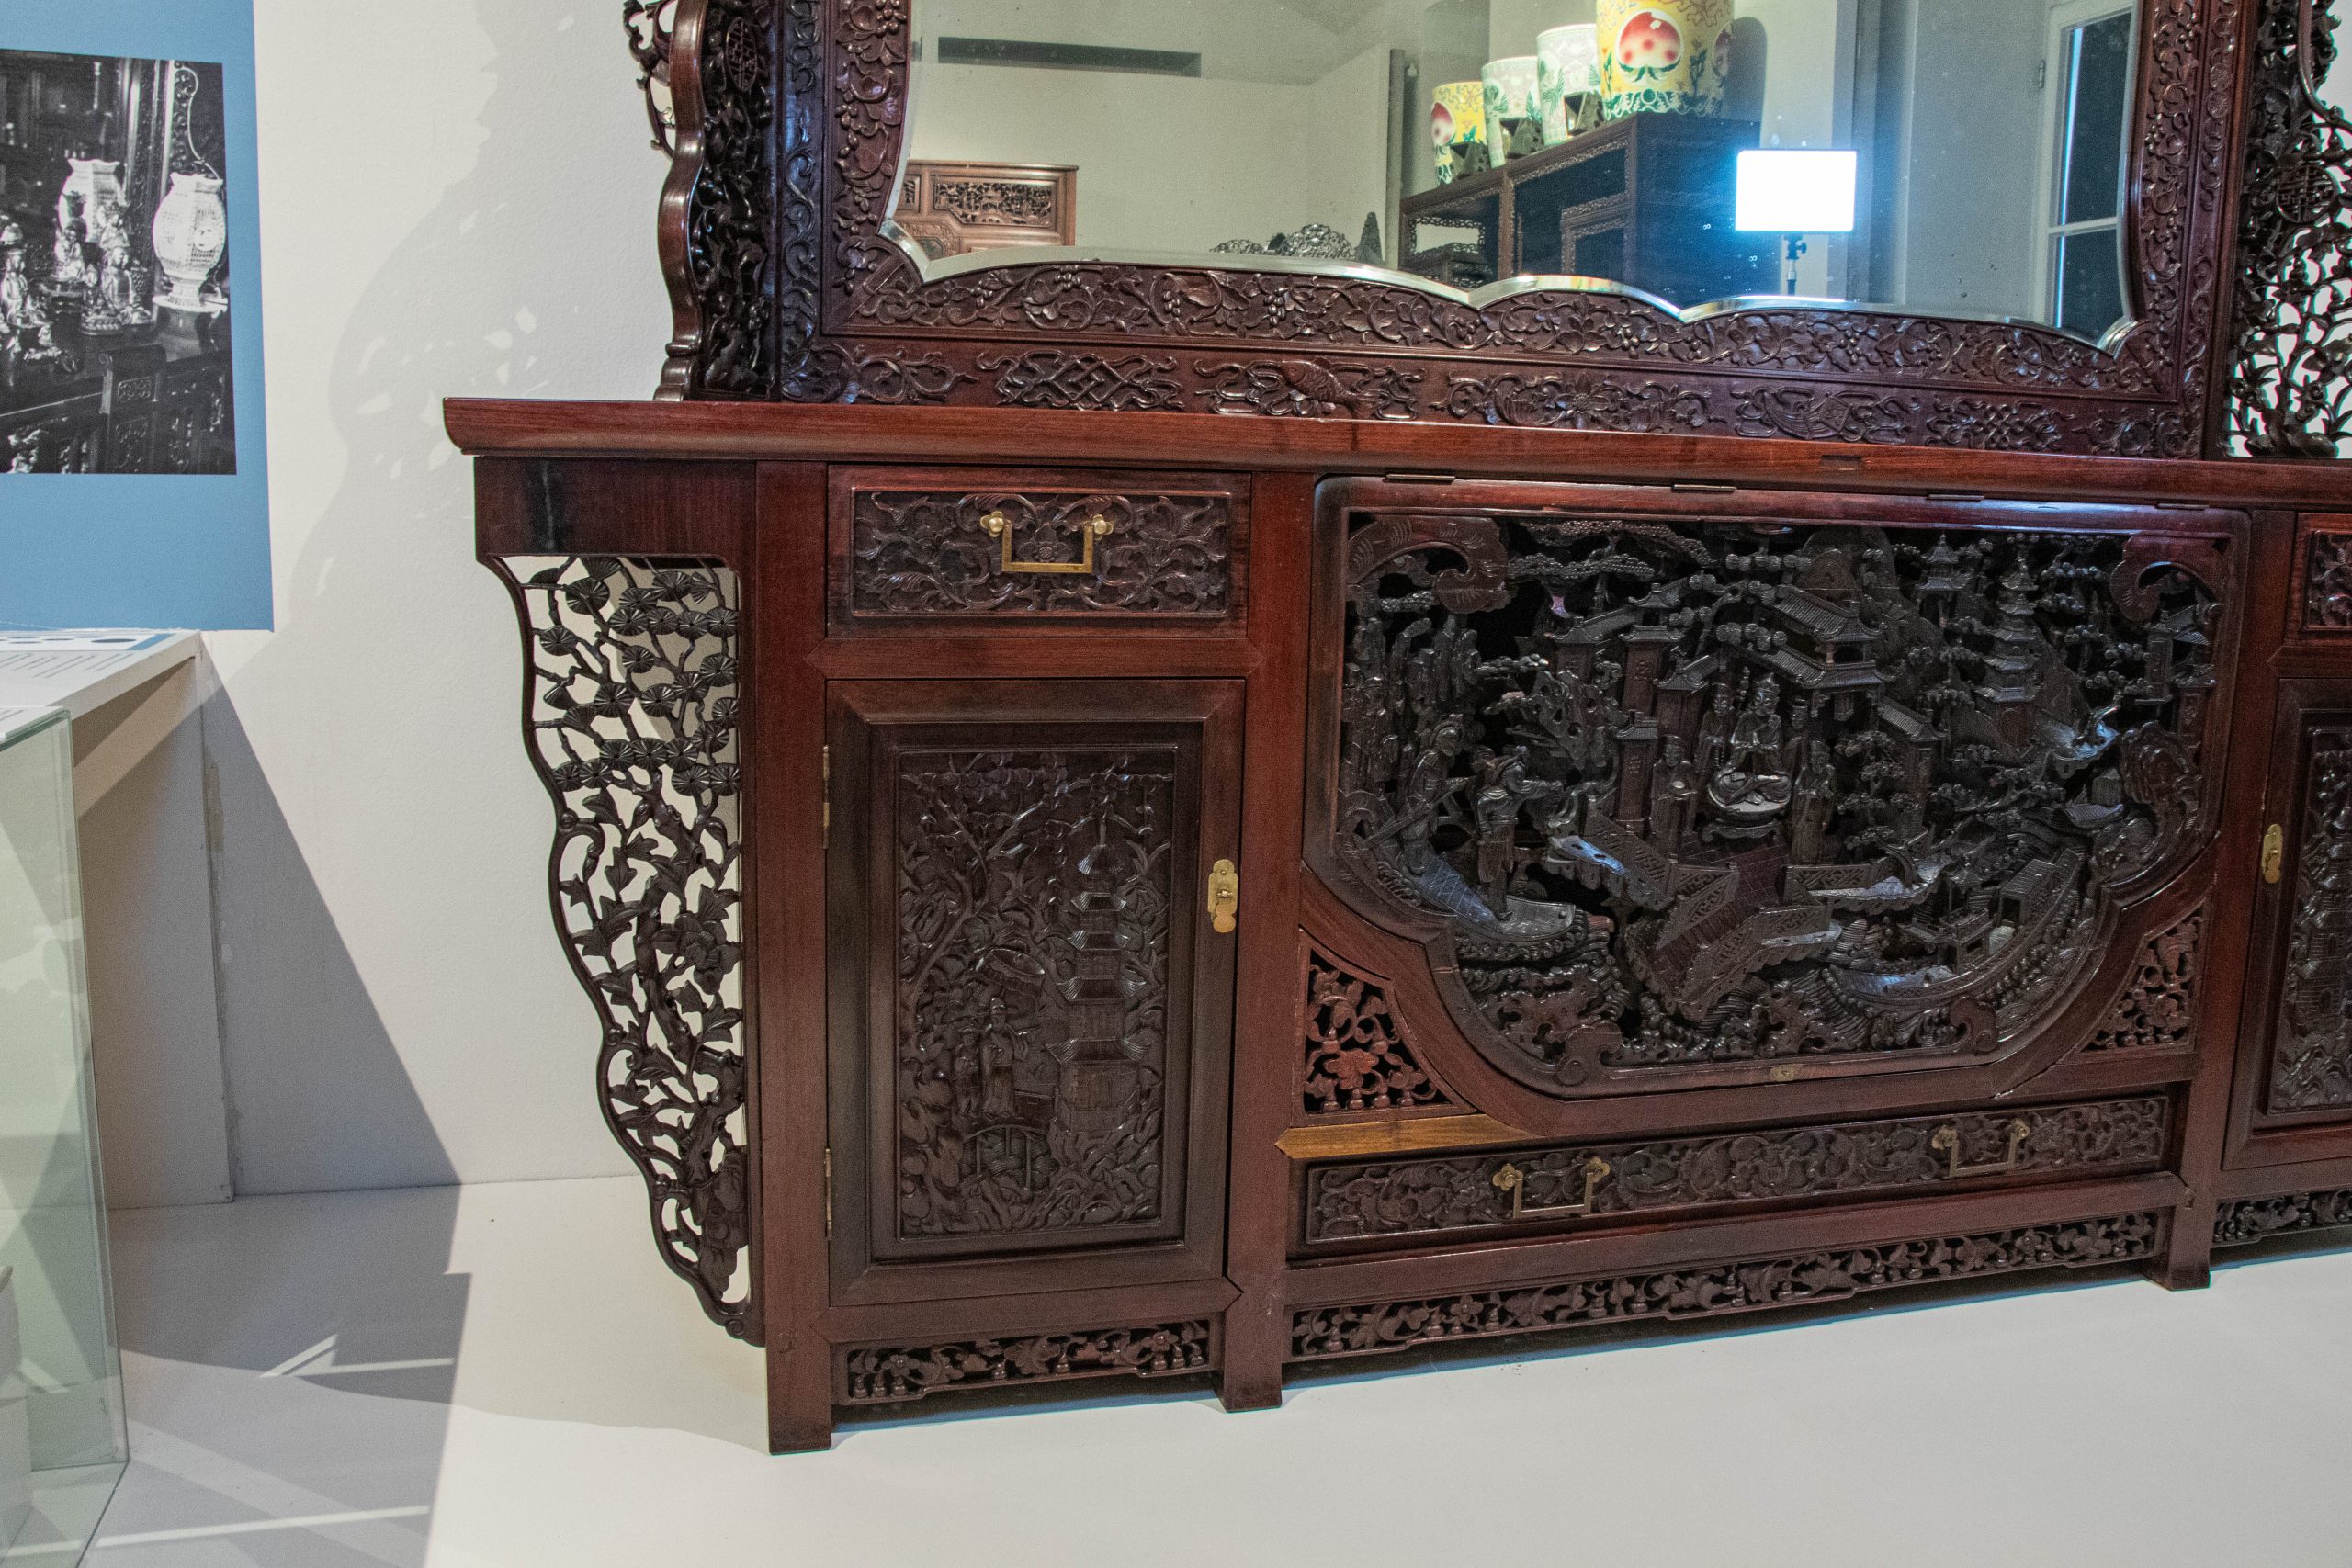
Select photograph of the dresser after colour-correction, Photograph © Max Frühwirt 2024
The main goal of the processing step is to colour correct the images in such a way, that they appear both as flat and evenly lit as possible. Reducing reflections and evening out highlights and brightening shadows as much as possible while also opening the colour range as much as possible is also important. Since the photogrammetry software we’re using uses colour information to both accurately locate the camera’s position within the 3D environment – for which a wider colour spectrum can be advantageous – and to create the future texture of the scanned model, this step is paramount. Especially for the later visualisation of our scan, in which our own sources of light may be added and rendered, an even texture not containing too much light information from the original object, is an advantage.
Step 3 – 3D Scanning via Photogrammetry software
For our next step, it is finally time to process the collected data into a first 3D scanned model. We therefore import our created and processed image-set into our photogrammetry software, in this case Reality Scan.
After all images are imported, they first need to be aligned with their real-life position at the time of documentation, meaning the cameras’ positions within virtual space will be determined based on their real counterparts. This step is crucial, as during the process of alignment, the software already pre-compiles the taken images into different components based on what it perceives as different objects of documentation. As such, this step can already hint at incomplete documentation or, in case of very complex geometry, difficult 3D topologies which may require additionals support or documentation to ensure a complete set of information and smooth processing.
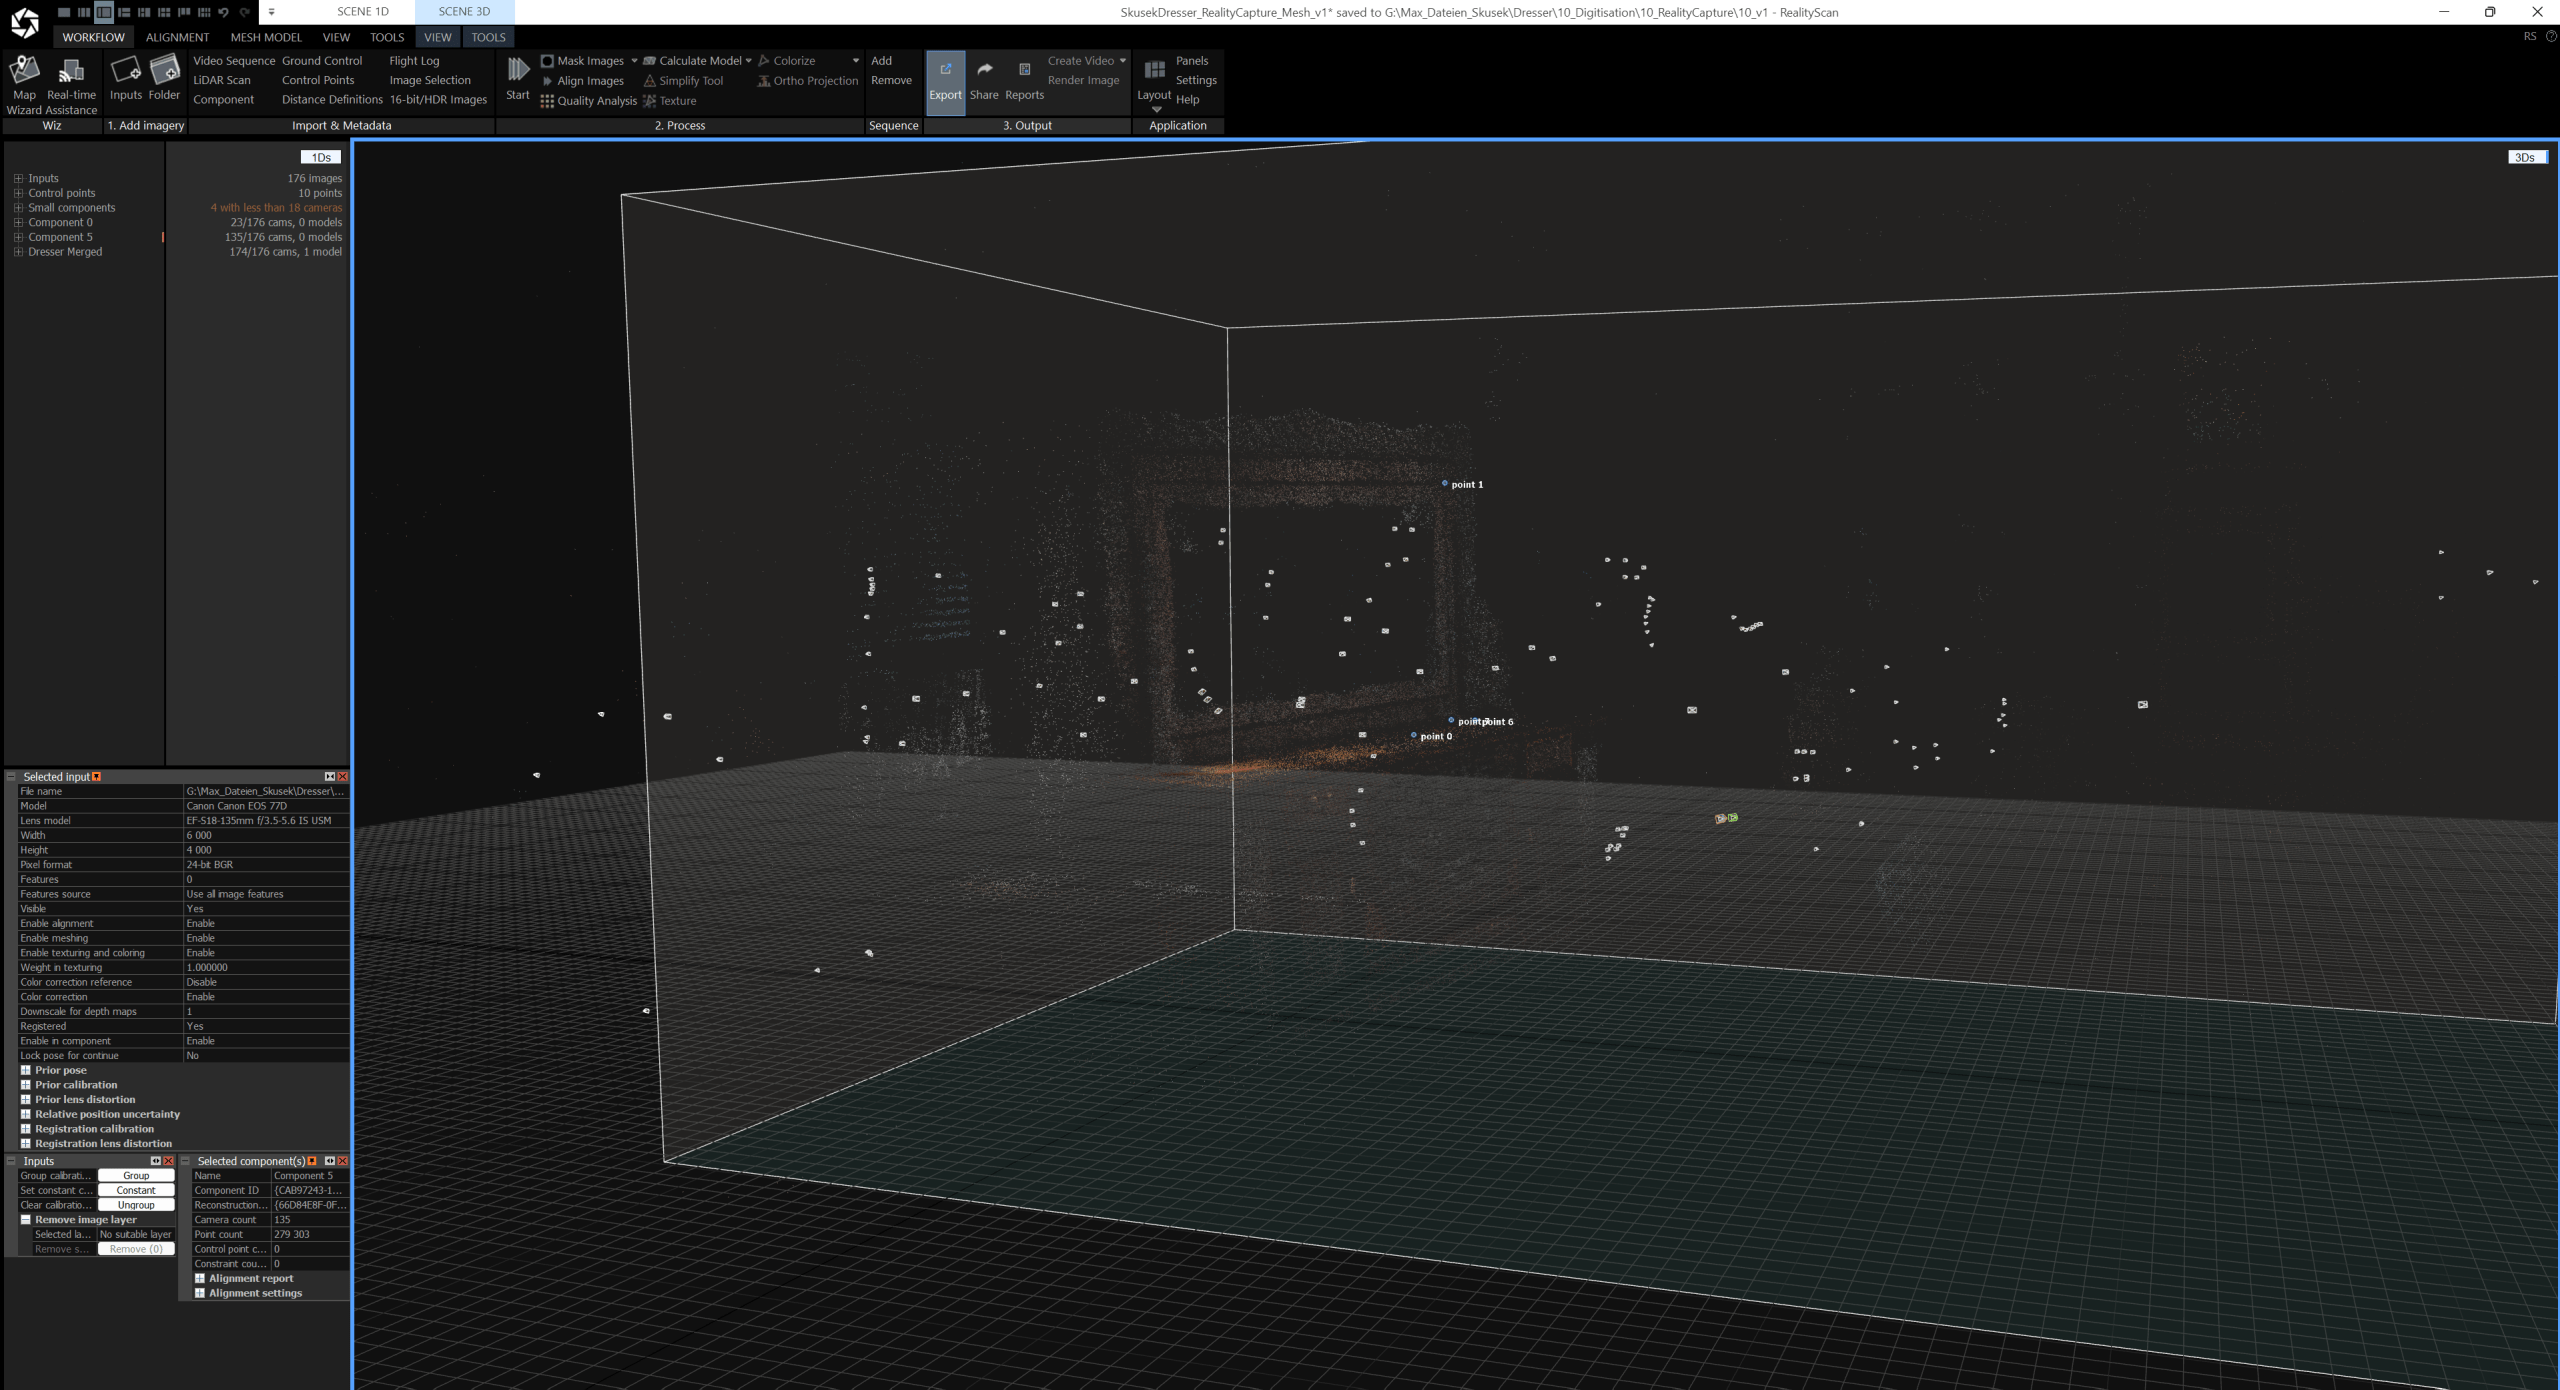
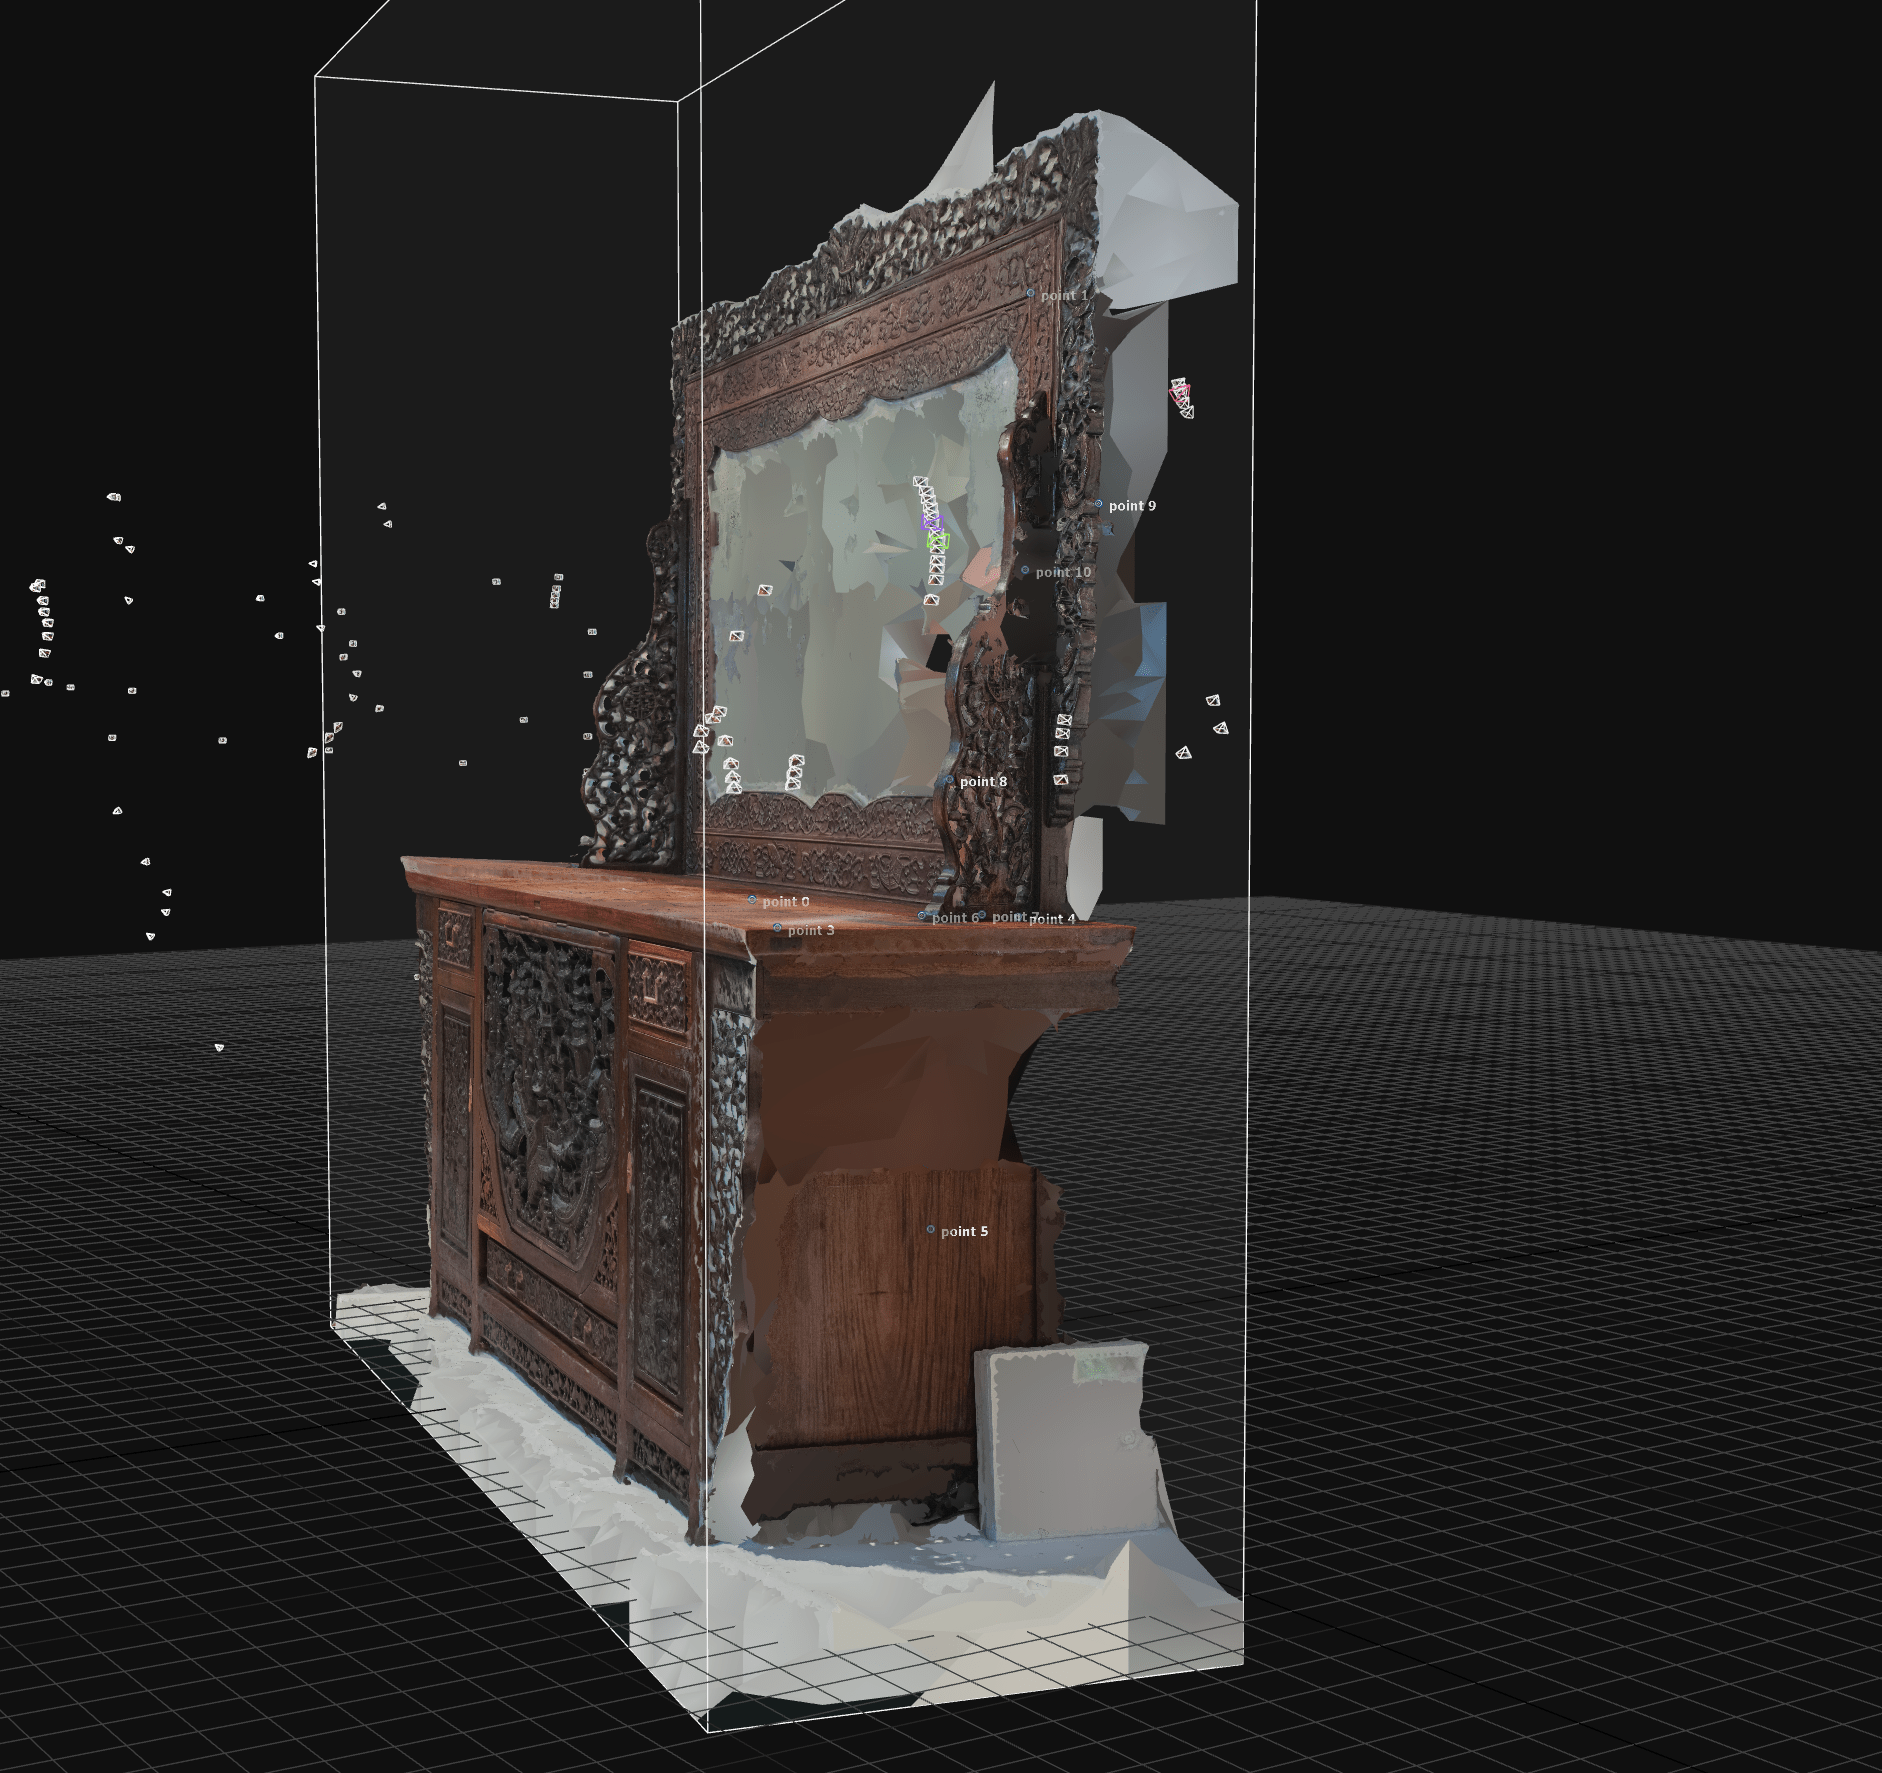
The different components and reference points in RealityScan, Screenshot © Max Frühwirt 2024
In the case of our dresser, for example, due to the high complexity of the carvings, the reflective wooden surface and mirror and the multitude of angles it was documented from, the software initially assumed the taken photographs to depict a total of 6 different components. In such a case, placing reference points on different recuring distinct features within the images can act as a support in merging said components. As this process of manual support can be quite time consuming and tedious, however, it is usually faster to take additional complementary images to support a holistic alignment in the first place. Due to the limited access to the dresser, however, in our case, the manual process was chosen. By placing a total of ten reference points, it became possible to merge the components and a first complete scan of the dresser was created.
Step 4 – Manual refinements and corrections of the created digital twin
The photogrammetry software Reality Scan already provides a first 3D scan of the object. Nonetheless, said model sadly oftentimes still may feature digital artifacts and scanning flaws caused by missing or misinterpreted information. As such, manual processing is usually necessary, which can lead to a much cleaner and more accurate representation of the scanned object while eliminating said flaws. It furthermore can be a crucial step in optimising the scan for its different intended purposes, as a VR representation may require a different level of detail and optimisation than a model used for visualisation and video rendering.
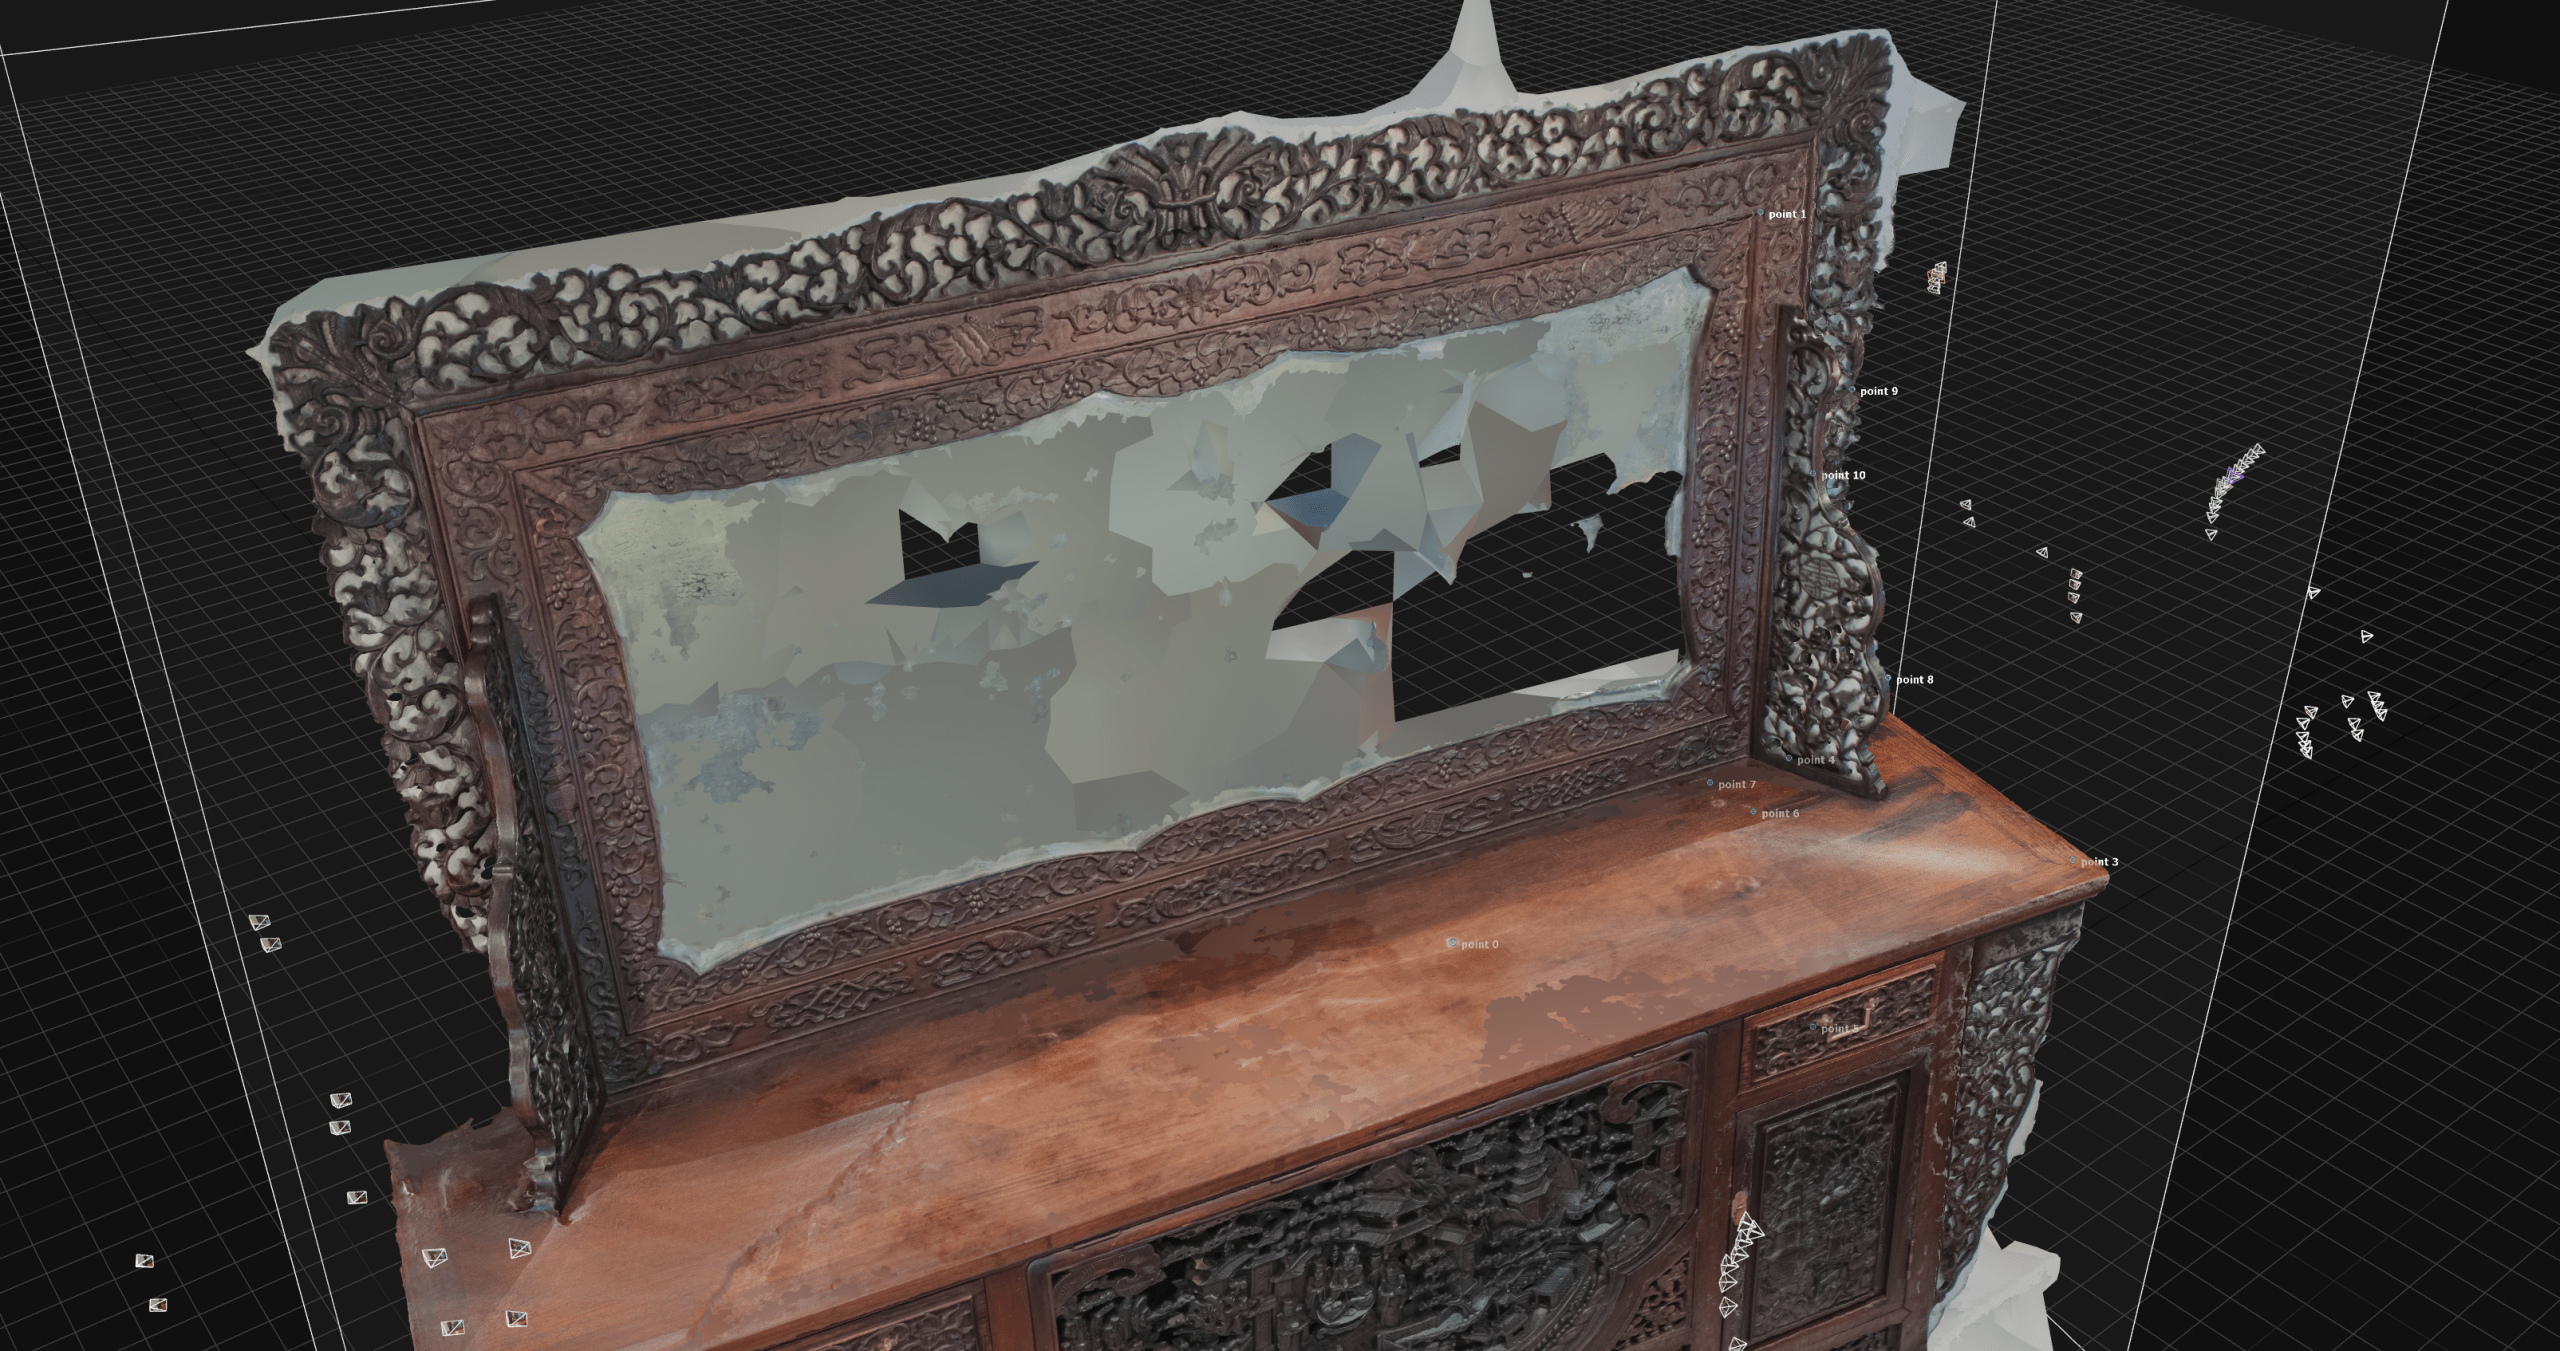
Screenshot 01 of the finished scan including flaws and digital artifacts, Screenshot © Max Frühwirt 2024
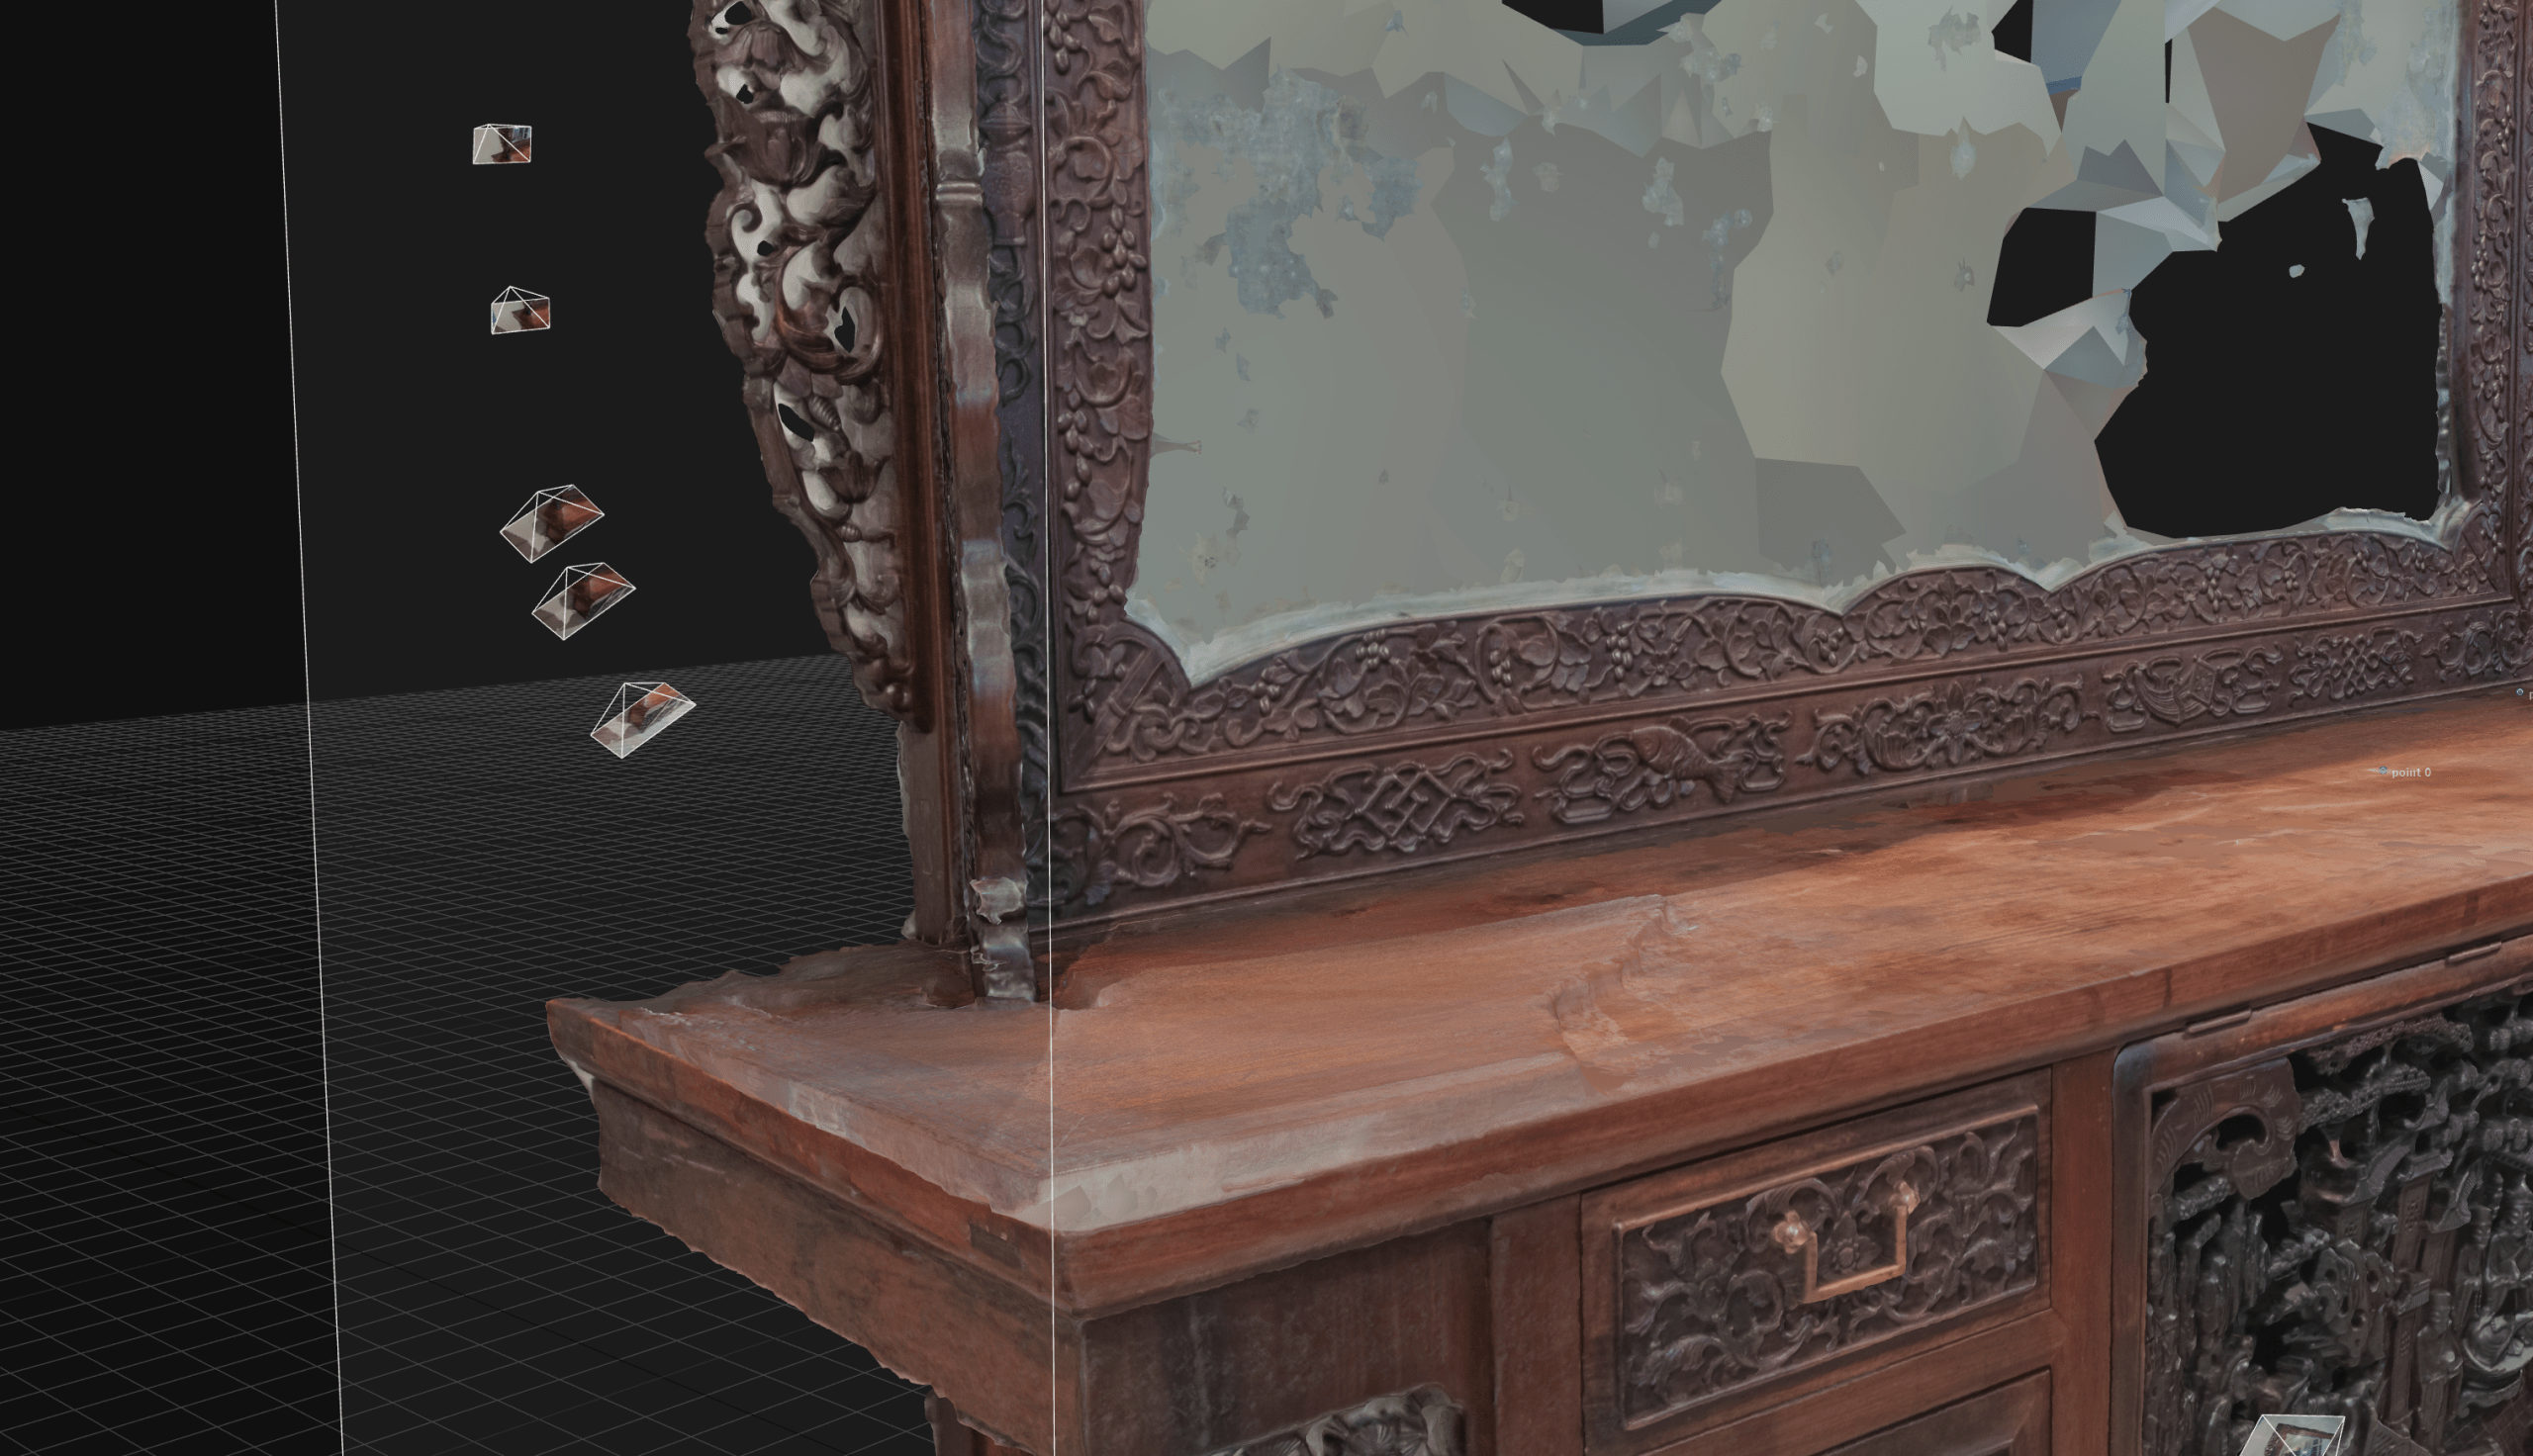
Screenshot 02 of the finished scan including flaws and digital artifacts, Screenshot © Max Frühwirt 2024
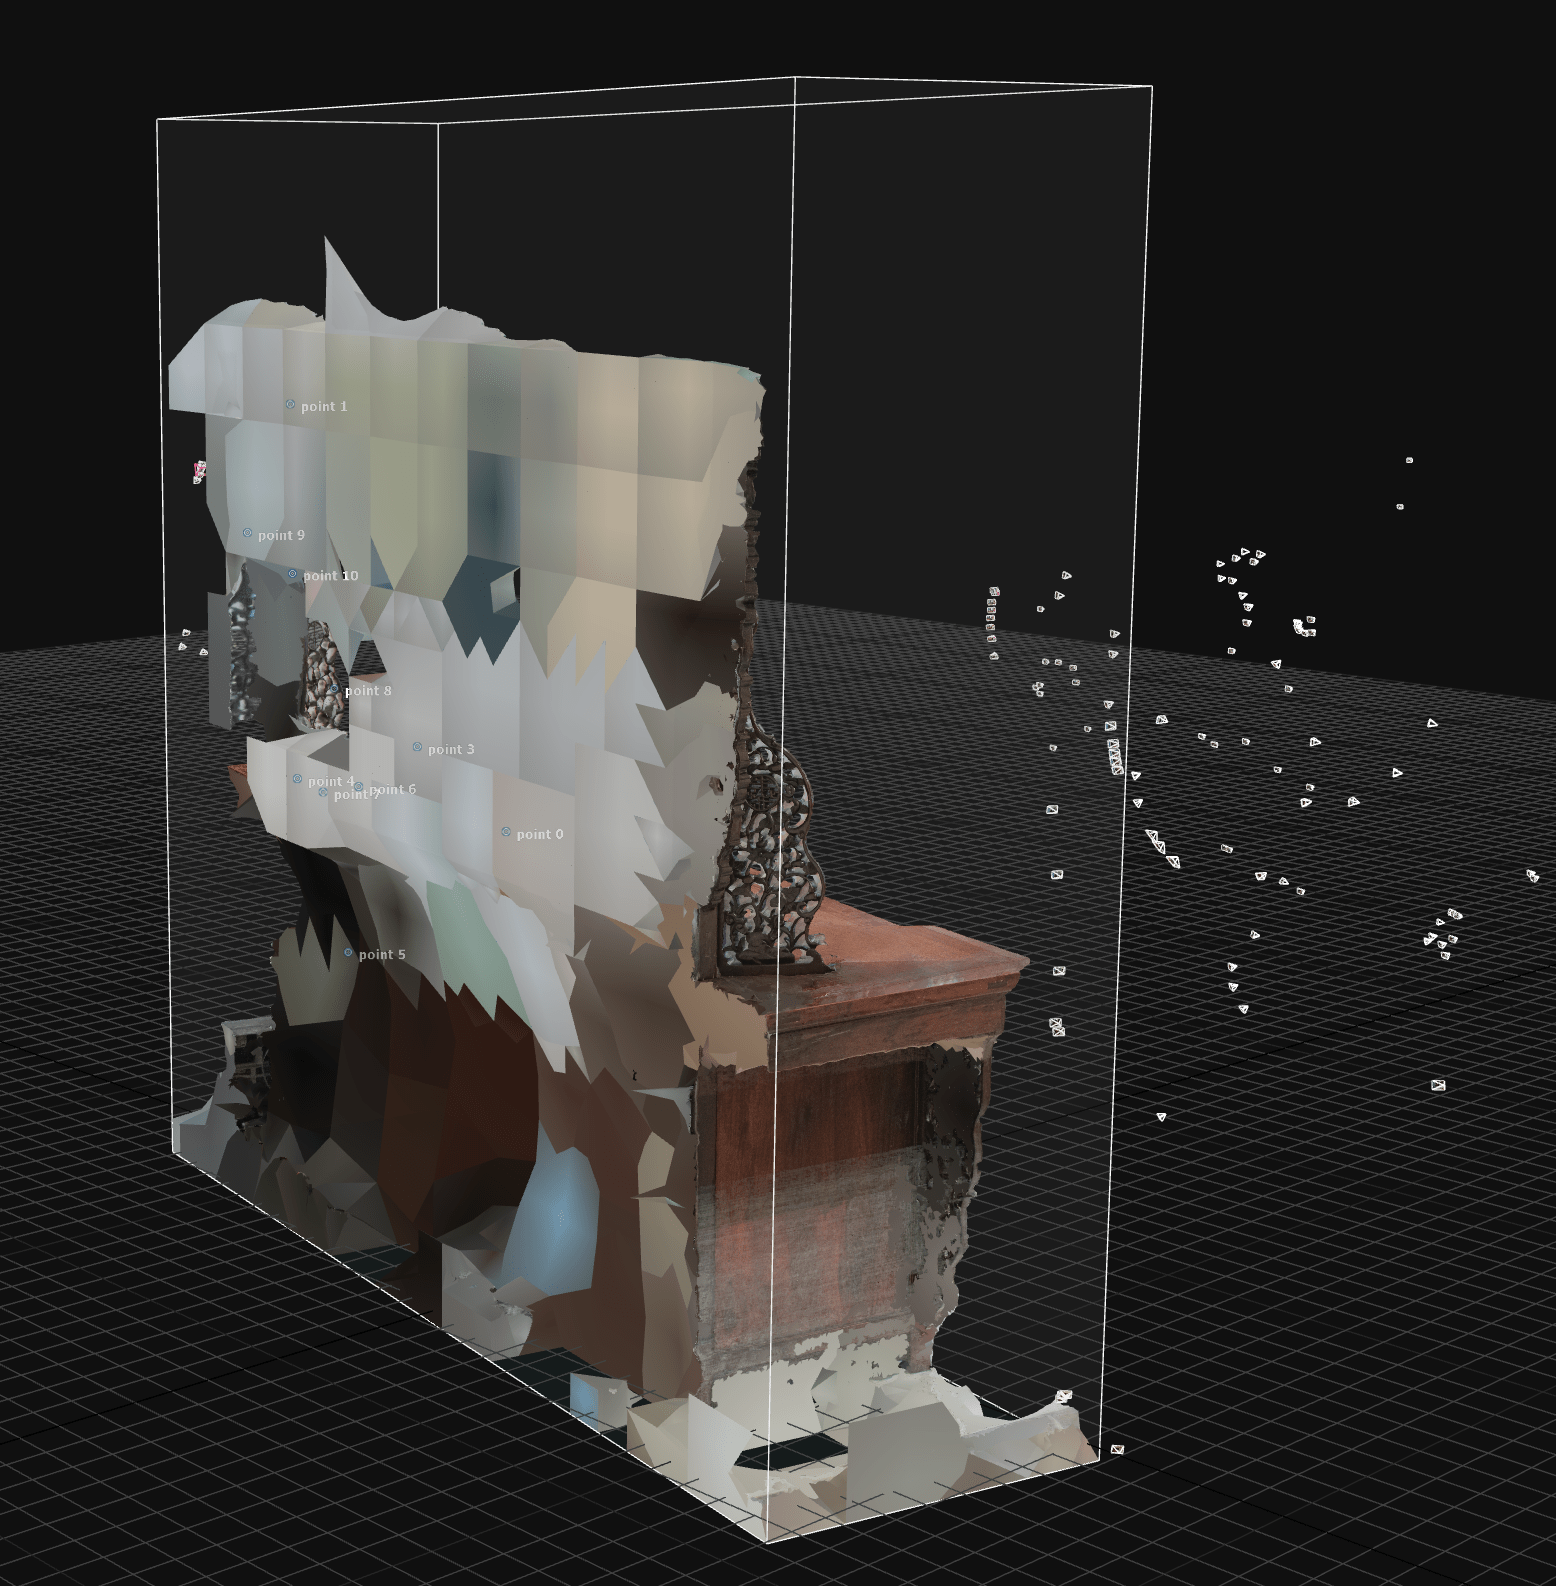
Screenshot 03 of the finished scan including flaws and digital artifacts, Screenshot © Max Frühwirt 2024
Screenshot 04 of the finished scan including flaws and digital artifacts, Screenshot © Max Frühwirt 2024
While this blog post focuses on showcasing our workflow and thus displays the dresser as a work in progress, including all of its flaws, it will of course be further processed and presented as a finished model as well. For our workflow, we have chosen to use Blender, as it is a free, open-source software solution that combines all features necessary for cleaning and optimising the model while also allowing decent renderings and videos to be produced all within one step. This also eliminates the need of multiple imports and exports between different CAD programmes, thus lowering the risk of compatibility issues or loss of information.
Step 5 – Visualisation and presentation
After the model has been cleaned and processed, both the whole 3D model or even only parts of it, depending on the desired results, may be visualised and presented in a variety of ways. These include but are not limited to interactive experiences in artificial reality (AR) and virtual reality (VR), web-based modes of presentation such as this blog post, rendered videos and close-up images. One such example showing the remarkable level of detail that can be achieved via such a scan can be seen below. The presented close-up video of the dresser’s carved board has also been exhibited as part of the exhibition Asia in the Heart of Ljubljana: Life of the Skušek Collection at the Slovene Ethnographic Museum (SEM).
Close-up of the dresser’s carved front plate, Rendered video © Max Frühwirt 2024